Showing posts with label Crafts. Show all posts

Wednesday, September 12, 2012

MONSTER Letters


Today I'm blogging about one of my new favorite creative places to visit, browse, and spend money at. The place is called The Wood Connection and it's a store filled with holiday projects of every kind along with all the supplies you need to make the many projects in their showroom. You will also find wooden frames of all sizes, plaques, blocks, ribbons, paints, tools, cut vinyl letters, sayings and also a variety of wooden letters. The hardest part is picking out just ONE project.

I recently finished making this set of MONSTER letters that I'm using for my Halloween decorating this year. I think my grandkids will really like them. I still have to purchase the three little monsters and I thought it would be fun to put their names on each of the three stands. 

Go HERE to see the 3 little wooden monsters I have yet to make.


Click HERE to see a few more of their Halloween Projects.

What I love most about their projects is that it takes a minimal amount of painting and all of the designs on each of the letters is done using scrapbook paper and then adding trim like ribbon, ric rac, buttons, and fur, just to name a few. On this project I also used heat set jewels on the letter T. You should be able to click on each of the pictures to get a closer look.


Go HERE to see their CRAFT TIPS on how to paint the blocks and apply the paper to the wood.


Go HERE to follow The Wood Connection on PINTEREST!


Right now The Wood Connection is only located in Utah but when I talked with the ladies at the store they were hoping to be able to ship items in the not too distant future. So, next time you find yourself in UTAH make sure to visit one of their three locations and give yourself at least an hour to browse and take it all in.


The Wood Connection is located at:

6680 South 300 West
Murray, UT 84107
801.265.2255

530 East State Street
American Fork, UT
801.763.9556

Furniture Store
372 West Winchester Street
Murray, UT
801.261.1013

Tuesday, July 10, 2012

Ribbon Flower Tutorial & Wedding Pictures

Life has been crazy around here since getting home from New Zealand and I still need to do a few vacation posts and show you pictures of our adventures along with pictures from two quilt shops that I was able to visit but in the meantime I have a tutorial for you. You can see the post I did HERE about making my daughter's bridal bouquet.


Supplies:
  • 1 yard 3/4" Chevron Twill Tape from Kari Me Away
  • 1 Decorative Button
  • Needle
  • Thread
  • Scissors
  • Small Ruler
  • 7 Straight Pins

Instructions:
1. Begin by cutting 7 strips measuring 5" in length.


2. Align the ribbon next to your ruler and insert a pin at the 2 3/4" mark on the ruler.


3. Fold each end in toward the 2 3/4" measurement and secure with two pins.


4. Fold the shorter end toward the larger end and secure with a pin. Repeat this process for the remaining 6 ribbon strips. This will create the petals for the flower.


5. Thread needle with quilting thread (it's stronger) and knot the end. Insert the needle and using a running stitch go in and out twice. Refer to picture below.


6. Repeat this process for the remaining 6 ribbon petals. Stringing them onto the quilting thread one at a time as seen in the picture below.


7. To Connect the flowers insert the needle into the first ribbon where you started.


8. Pull thread to gather the petals. Continue to sew around the back of the flower stitching from petal to petal to secure the flower. Knot the end of your thread but don't cut it off. You will bring it to the front to sew on the button.


9. Turn the flower over and stitch on the button. Tie off the thread and cut the end.


Now that you've made a flower you may be asking what to do with it. Well, here are a few suggestions, you can sew it on a pin back to attach to any item like a purse, an apron, or a blouse. You can also glue the flower to a headband or hair clip. You can also do what I did and make a handmade bridal bouquet with all sorts of ribbon flowers.


Here are a few pictures of the happy couple and the bridal bouquet.


Saturday, May 26, 2012

Saturday Projects-Bridal Bouquet

I'm sure someone has been missing me and I wanted to check in before we fly out to New Zealand this evening for my daughter's wedding. About a year ago she met a young man and fell in love. The wedding is June 1st in the Hamilton New Zealand LDS Temple. We will enjoy meeting up with family and friends as we celebrate this joyous moment for Chip and Ariel. They have waited a long time for this day to come.

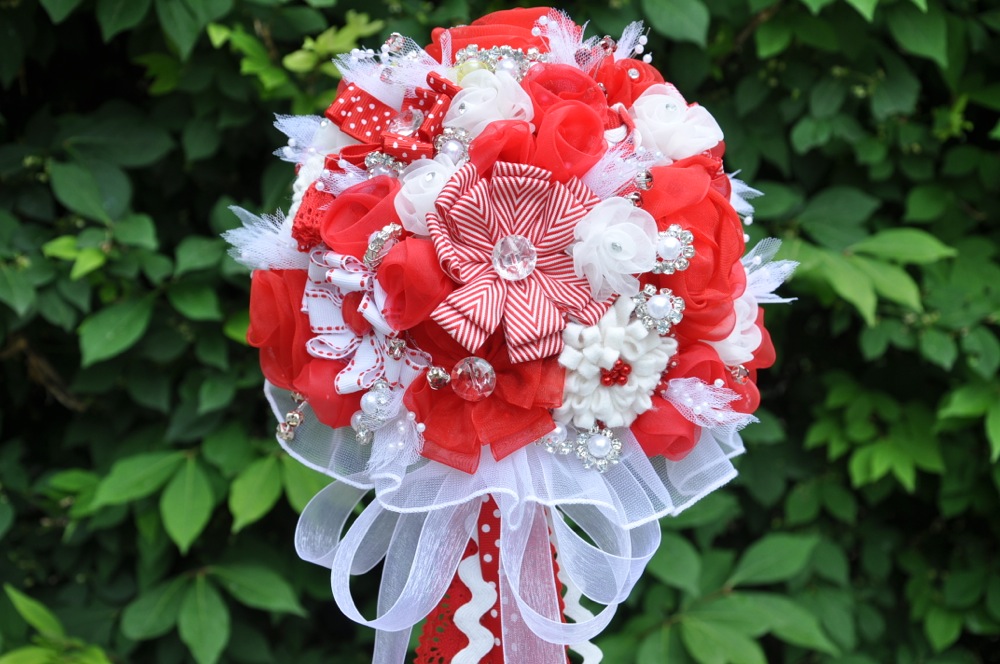
My daughter's favorite color is RED. . . go figure. . . she must be her mother's daughter. . . lol. Well, Ariel know's how crafty her mother is and she asked me to make her bridal bouquet out of handmade flowers. Well, I just so happen to have a PINTEREST board of fabulous flowers. Some of which I modeled my flowers after.


I will be doing a tutorial on the Ribbon Daisy Flowers that you see in the bouquet. They are the flowers with the red or glass buttons for the centers.


I made Organza Flowers, Organza Roses, Wool Felt Flowers, Ric Rac Flowers, and Ric Rac Roses.


I also made a visit to Hobby Lobby to buy a few fillers like tulle and pearl picks. I also made a few other pics using vintage pearl flowers and red jewels that I also found at the store.


I love how it turned out and can't believe how pretty it is.


Ariel loves it and the bouquet will look darling with her Vintage Wedding Dress that she found while shopping at a Vintage Shop in Seattle Washington.


I thought you'd like a closer look.


Here's a picture of the soon to be wed couple!

I know it's a more serious look but they had a 10 minute photo shoot in New Zealand while she was there for 10 days and they only got a few pictures together. They couldn't  do retakes because she was leaving the next day!! You will bet that I will be taking TONS of pictures at the wedding. I will be so annoying that it will drive them crazy~!! But, they will be so grateful in the end.

Chip and Ariel


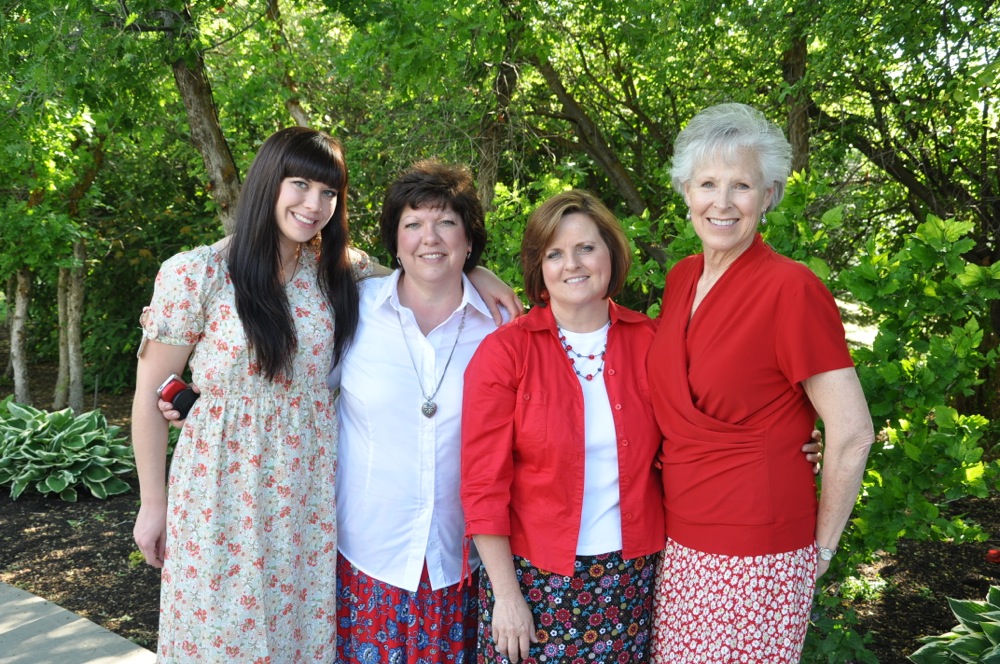
Here's a picture that was taken at the Bridal Shower.
(L to R) Ariel, Me, Eileen, Susan

Thanks Eileen, Susan, Lorie, Meg, and Denise for a beautiful Bridal Shower!


Well, I'm off!!! My last day of school was yesterday and I am sooo READY for some time away. Once the wedding is over we will have two more weeks to travel around and enjoy our time together. I wish we could take all of our family but just 3 of us are going. Myself, my husband, and my youngest daughter, McKenna. She's really excited but really nervous about the long flight and being away from her home, her family. her cat, and her friends. I keep reminding her that I'm going with her and that we will have the time of our lives, and it will be a great experience for her. I know her older sister would go in a heartbeat but she just had a baby two weeks ago. I will take lots of pictures and share them with you when I get back.

Have a great Memorial Day weekend!!!

Wednesday, January 18, 2012

Chair Makeover


One summer day I happened across this really cute chair while shopping at our local Deseret Industries (thrift store). I walked by this chair and it immediately caught my eye. I looked at the price tag and was a little surprised at the cost but loved it so much that I continued to look it over.


Lots of thoughts went through my head as I stood there.
Thoughts like. . .

"Where am I going to put it?
"Do I have room in my already crowded sewing room?"
"My husband is going to laugh at me and think I'm crazy."


Lol. . . I loved that chair so much that I didn't really care what he may think and when other ladies started looking at the chair I showed an attachment to it besides, when they saw the price of $25 they moved on anyway.

It had lots of scratches on it and was missing the lower spindle between the two sets of legs so, I probably paid too much for it but, every time I go to Deseret Industries I see ugly chairs so when I saw this one I just had to snatch it up. I'm really happy that I didn't leave it behind especially after I painted it!!!! Keep scrolling and you'll see why I love it so much!


I knew immediately what color I wanted to paint it!

Any guesses? lol.

Yes!

It was Definitely. . .

RED!!

CHERRY RED to be EXACT. . .


And here are the awesome results of the make over.

Isn't she pretty?


Here's a look at the missing spindle.

But, I don't mind it so much.


It's such a pretty red when sitting in the shade.


My Cherry Red Chair looks totally awesome in my newly Remodel Sewing Room which I will be showing you really soon once I get the special quilt for my room back from the quilter and get the binding on it and I also, just need to finish the curtains too and then I'll be ready to take pictures and show it off.

Remember that flood we had in the basement before Thanksgiving and Christmas? Well, my husband surprised me with a makeover for my sewing room.

I'm sure you know that if you give a quilter new flooring for her sewing room that you're going to have to have new paint to go along with it, and. . . new curtains, and . . . a new quilt, and. . . and. . . I was hoping for a new Red Horizon sewing machine too but, that will just have to wait I'm afraid.

Anyway, I'm super excited to share it all with you in the not too distant future.


Mrs. Bitty Bits Cherry Red Chair.

Monday, April 25, 2011

Fluffy Stuffy Bunnies

Spring has been SLOWLY making it's way to Utah with varied kinds of weather from Snow to Rain to Sunshine and tonight we even had some Thunder! Hilarious, I know! I think we are definitely READY for some SUNNIER DAYS!

Anyway, the bunnies have been hippity hopping around the house and have been begging for a photo shoot. So, without further ado. . .

Here are a few of the bunnies I've been making for Springtime. . .


If you've fallen in love with the Fluffy Stuffy BUNNIES like I did. . . you can find the FREE Bunny pattern HERE and the FREE Bunny Dress Pattern HERE! They are so cute you will want to leave them out all year long.

This wonderful tutorial was created by the FAMOUS Jennie B. Harris of ALLSORTS. She is a very talented designer and artist with many credits to her name. Also, she recently designed an interactive children's book that you can download to your iPad. The information can be found on her blog HERE! You can also go to Apple's APP store and download the book. It's called "Bunnyfur's Easter Eggs" Go HERE to download it.

FYI: Just in case you're wondering. Yes. I did change the pattern slightly by adding bias binding to the neckline of the dress and left the top edges of the dress open for turning and then the raw edges are sewn into the binding.

I made the flower that you see clipped on the Bunny's ear using Felt and one of my favorite flower dies that I cut out using my Sizzix Die Cut Machine. I also made the covered buttons that screw onto a hair clip.

I almost forgot to tell you that I got the cute little plastic pots/cups at BIG LOTS for a $1.00 a piece. They looked like they could pass for little baskets to hold my Bunnies in and they came in lots of pretty colors. I also put candy in the eggs and wrapped the baskets in clear cellophane wrap that I tied at the top with a pretty bow.

Monday, June 21, 2010

Tool Bracelet Tutorial


I know I've been missing in action for several weeks now but, I'm back with a great tutorial to start off your week. Let me introduce you to what I'm calling my Tool Bracelet.

I know it's a small project but a ton of work went into making this tutorial so I'd be happy if you linked to it and shared it with your friends. Infact, I'm going to be giving away a few Tool Bracelets in a giveaway. Keep an eye out for that giveaway in the next few days.

It's basically a really small and cute bracelet for your scissors or rotary cutter. The Tool Bracelet helps you identify your tool when quilting with a group of ladies at a quilt retreat or during a quilt class or at your quilt group gatherings. The initial of your name is stamped on the plastic disc and is then attached to the bracelet with a jump ring. You'll also notice the bit of bling attached to the flower dangle and scalloped letter disc.


Part One:
Making the Plastic Dangle


Supply List:

Please note:
I've taken the time to link nearly every supply you will need to make this project. You can purchase some of your items at most craft stores or you can use the online links I've provided for you. I buy the majority of my beading items online through Artbeads.com and I've used them for years with 100% satisfaction. They are a great source for a HUGE variety of beads with quick and reliable service, competitive pricing, and free shipping when you spend at least $10.00. Now my secrets out! lol. Also, Let me know if you have any trouble with the links and I will try to help or fix it. Thanks.

Warning: Beading and Jewelry making can easily become another craft addiction if you're not careful. lol. It's something I've enjoyed for many years!!
Enjoy visiting Artbeads!
  • Colored Shrink Plastic by Grafix
  • 2" Scalloped Circle Punch by Marvy Uchida
  • Retro Flower by EK Success
  • Everyday Alphabet Clear Stamps by Heidi Grace
  • Clear Acrylic Stamping Block from Joann's (on sale now $4.19)
  • Staz-On Jet Black Ink by Tsukineko or Joann's (on sale now $6.29)
  • 1/4" Hole Punch
  • 1/4" Square Hole Punch (optional)
  • Craft Oven (On sale now $35.99) from Joann's Fabric & Craft Store (I used the oven I had on hand)
  • Parchment Paper from the grocery store
  • Bamboo or wooden skewers from the grocery store
  • (19) 4mm Swarovski Round white pearls from Artbeads
  • (4) Silver Bali Beads (more expensive option @ $1.92 a bead) from Artbeads
  • or (4) 6mm Swarovski Bi-cone Crystals (less expensive option @ .16 cents a bead) in any color from Artbeads
  • (1) 4mm Silver Daisy Spacer from Artbeads
  • (1) 2mm Silver Bead from Artbeads
  • (1) 10x4mm lobster claw from Artbeads
  • (2) 2 x 2mm crimp beads from Artbeads
  • (1) 5.3mm open jump ring from Artbeads
  • (1) 2" Head pin from Artbeads
  • 8" length of Beadalon 49 strand bead stringing wire from Artbeads
  • Wire Cutter (on sale now $5.59) from Joann's
  • Wire Looping Pliers (on sale now $6.99) from Joann's
  • Crimping Tool from Artbeads or Joann's (on sale now $6.99)

Here's a picture of the Shrink Plastic and Big Punches

Here's a picture of the Alphabet Stamps, Black Staz On Stamp Pad, Clear Acrylic Stamp block (not pictured), 1/4" punches and a before shrinking and after shrinking look at the shrink plastic.

Instructions:

1. Decide on the two plastic colors you want to use.
2. Punch out the circle with the scalloped circle punch.
3. Punch out the flower using the retro flower punch.


4. Decide on the letter you want to use from the Everyday Alphabet set.
5. Attach letter to the clear acrylic stamp block.
6. Center and carefully stamp letter on plastic circle (it will slide if you're not careful). Let dry.


7. Make sure to read over the manufacturer's instructions for using the shrink plastic.
8. Preheat craft oven/toaster oven to 300-350 degrees. I found the 300 degrees worked best.
9. Cut two pieces of parchment paper to fit your oven tray. One for the bottom of tray and one to cover your shrink plastic.
10. Place one piece of shrink plastic in the oven at a time. You can do more it's just easier with one piece at a time.
11. Cover with parchment paper and lightly hold down with skewer. Note: This will help to prevent the plastic from sticking when it curls. I found the circles curled really easily and the opposing edges would stick to each other and then not uncurl like the instructions indicate. You will want to do a few testers for your oven and to get a feel for how the plastic works and shrinks and again please make sure to read over the manufacturer's instructions if you have any questions about the product.

12. Before taking plastic out of the oven, take off the top parchment paper and use the skewer to flatten the edges by rolling the flat edge over the plastic like a rolling pin. It does harden quickly.

Part Two:
Making the Crystal Flower Dangle
These are the components you will need to make the Crystal Flower Dangle.


Supplies Pictured from left to right:
  • (1) 5.3 mm open Jump Ring
  • Plastic Scalloped Circle Disc (shrunk)
  • Plastic Retro Flower (shrunk)
  • (1) 2" head pin
  • (1) 4mm Swarovski Crystal
  • (1) 4mm Silver Daisy Spacer
  • (1) 2mm Round Silver Bead
Instructions:

1. Place Crystal, spacer, and bead on the head pin as seen in picture below.
2. Place wire in Wire Looping Tool making sure to leave approximately a 16th of an inch space between pearl and tool. Close handles. This will curve the wire.
3. Bend crystal side of head pin away from tool and curve the opposite side of wire around the needle part or the tool until it crosses over the head pin.
4. Twist the excess wire around the head pin.
5. Using wire cutters trim the excess wire.

6. Now you're ready to assemble the dangle on the jump ring.
7. Take the jump ring and open it by twisting one side up and one side down. Do not open it by pulling it apart, this will make it easier to close and keep a narrow space where the ends meet
8. Take the plastic disc and place it on the ring with the back/wrong side facing you.
9. Take the plastic flower and place it in front of the back side of disc.
10. Take the Crystal Dangle you just made and place it on the jump ring.


11. Close the ring in the reverse manner I explained in instruction #7.
12. You are now ready to move on to Step #3 Making the Bracelet.


Part Three: Making the Bracelet
and Putting it all Together


Supplies Pictured Above:

  • (4) Bali Beads or Crystals
  • (19) Pearls
  • (2) Crimp beads
  • (1) Lobster Claw
  • (1) 8" length of Beading Wire
  • (1) Crystal Flower Dangle (made in Step Two)
  • Needle Nose Pliers
  • Wire Cutter
Instructions:

1. Take the Crystal Flower Dangle and thread wire through the hole.
2. Slip the crimp bead with both ends of wire going through the hole of crimp bead.
3. Leave at least a 1" wire tail.
4. Using the back opening of the crimp tool crimp the bead.
5. Move crimped bead to front opening of crimp tool to fold the crimped bead into each other.

6. Thread on two pearl beads making sure the 1" tail end is also fed through the pearls. It will be a tight fit but it will work.
7. Thread on one bali bead making sure the 1" tail end is also fed through the bali bead. Trim excess wire.


8. Thread on 3 more pearl beads.
9. Thread on 1 bali bead.
10. Thread on 9 pearl beads.
11. Thread on 1 bali bead.
12. Thread on 3 pearl beads.
13. Thread on 1 bali bead.
14. Thread on 2 pearl beads.
15. Thread on 1 crimp bead.
16. Thread on the lobster claw.
16. Feed the remaining wire through crimp bead.
17. Move the crimp bead up the wire toward the lobster claw.


18. Feed the remaining wire through the two pearl beads and the one bali bead.
19. Pull the excess wire the opposite direction of the lobster claw to secure and create a tight fit.
2o. Cut EXCESS wire close to the bali bead making sure NOT to cut the wire for the bracelet.


Congratulations! You are now done!

Attach your "Tool Bracelet" to your favorite scissors or rotary cutter.


Just a note: I've made my best effort to link you to a SMALLER Bali Bead but if your (4) Silver Bali Beads are TOO big they may not fit through the hole of your rotary cutter but you won't have any problem with your scissors. When you're looking for Bali Beads they don't always give the size. Hint: The more the bead costs $$$ the bigger the bead will be.

I hope you enjoyed this tutorial and if you have any questions or see any mistakes please let me know. Thanks!