Showing posts with label Saturday Projects. Show all posts

Saturday, July 21, 2012

Saturday Projects-Blog Button

Here's my new Blog Button. It's been a long time coming but I finally found something that I'm proud of and willing to use to advertise my blog.

I'm still trying to figure out the html stuff and I can't get my picture to come up so I'm going about it another way. I've read a few blog posts about creating buttons but it's just not my expertise. So, I will continue to fumble in the dark and have a stab at it.

Wish me luck!

Here's my blog button and when you see it on the sidebar of my blog that mean's I succeeded! lol.

Update: I think I did it. You'll see my button on the sidebar! Yippee! I used this blog tutorial that really helped me out. Thanks to Somewhat Simple's Blog Post called Blogging 101-How to Make a Button

2nd Update: I got the dang button to work but it doesn't seem to link back to my page. HELP!!! If you can help me out then just give me a holler! I've followed the directions repeatedly to make sure I got it right. It looks right but doesn't want to link. I tested it on my family blog and it shows up just fine but doesn't link over. I finally resorted to adding a picture gadget and then adding the link.


I've been inspired by all of the Pincushion Jar's on Pinterest and when I found these jars at Hobby Lobby I knew I had to have them. They are the cutest shape and came in 4 sizes. I pick 3 of the 4 different sizes and took them home with me.


The metal tag I made using my dies and art metal. You can find a link to my blog post about how to do it and where to get the stuff you need to do it HERE. You can link to all four parts of the tutorial from there.


The biggest jar in the center is my little sewing kit jar and the smallest jar holds a few of my buttons. The medium jar holds my collection of HEART buttons.


Aren't they just adorable together?


I hope you enjoyed this Saturday Projects Post!

What have you been creating today?

Saturday, May 26, 2012

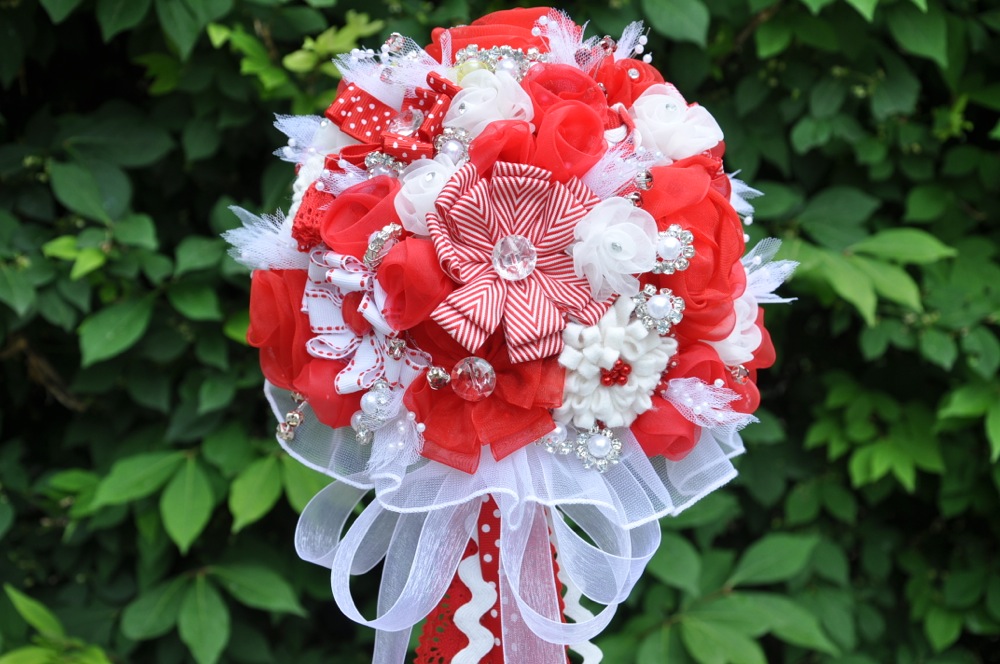
Saturday Projects-Bridal Bouquet

I'm sure someone has been missing me and I wanted to check in before we fly out to New Zealand this evening for my daughter's wedding. About a year ago she met a young man and fell in love. The wedding is June 1st in the Hamilton New Zealand LDS Temple. We will enjoy meeting up with family and friends as we celebrate this joyous moment for Chip and Ariel. They have waited a long time for this day to come.

My daughter's favorite color is RED. . . go figure. . . she must be her mother's daughter. . . lol. Well, Ariel know's how crafty her mother is and she asked me to make her bridal bouquet out of handmade flowers. Well, I just so happen to have a PINTEREST board of fabulous flowers. Some of which I modeled my flowers after.


I will be doing a tutorial on the Ribbon Daisy Flowers that you see in the bouquet. They are the flowers with the red or glass buttons for the centers.


I made Organza Flowers, Organza Roses, Wool Felt Flowers, Ric Rac Flowers, and Ric Rac Roses.


I also made a visit to Hobby Lobby to buy a few fillers like tulle and pearl picks. I also made a few other pics using vintage pearl flowers and red jewels that I also found at the store.


I love how it turned out and can't believe how pretty it is.


Ariel loves it and the bouquet will look darling with her Vintage Wedding Dress that she found while shopping at a Vintage Shop in Seattle Washington.


I thought you'd like a closer look.


Here's a picture of the soon to be wed couple!

I know it's a more serious look but they had a 10 minute photo shoot in New Zealand while she was there for 10 days and they only got a few pictures together. They couldn't  do retakes because she was leaving the next day!! You will bet that I will be taking TONS of pictures at the wedding. I will be so annoying that it will drive them crazy~!! But, they will be so grateful in the end.

Chip and Ariel


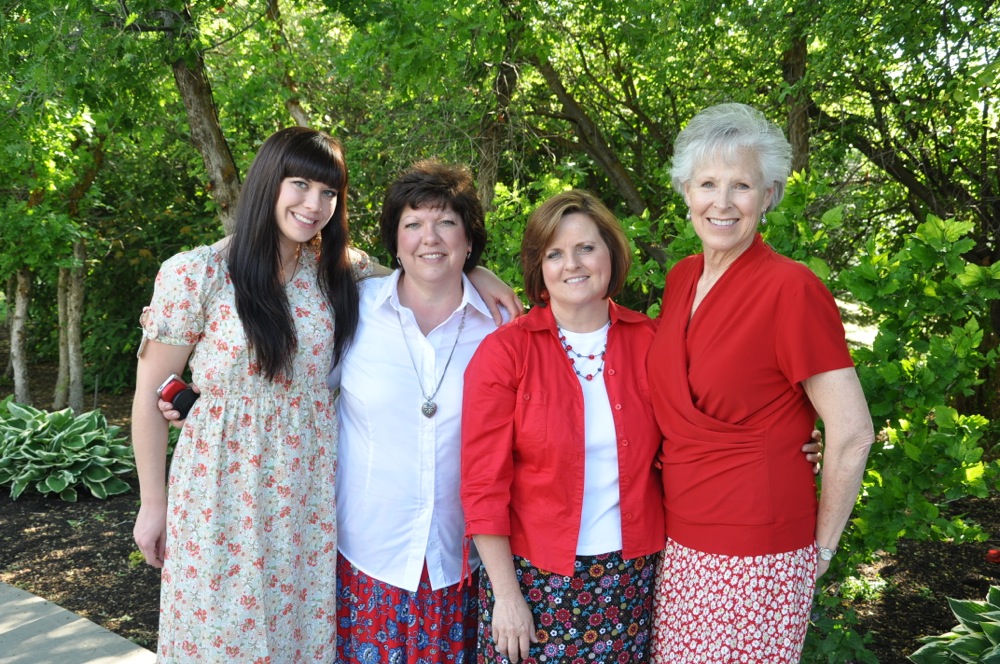
Here's a picture that was taken at the Bridal Shower.
(L to R) Ariel, Me, Eileen, Susan

Thanks Eileen, Susan, Lorie, Meg, and Denise for a beautiful Bridal Shower!


Well, I'm off!!! My last day of school was yesterday and I am sooo READY for some time away. Once the wedding is over we will have two more weeks to travel around and enjoy our time together. I wish we could take all of our family but just 3 of us are going. Myself, my husband, and my youngest daughter, McKenna. She's really excited but really nervous about the long flight and being away from her home, her family. her cat, and her friends. I keep reminding her that I'm going with her and that we will have the time of our lives, and it will be a great experience for her. I know her older sister would go in a heartbeat but she just had a baby two weeks ago. I will take lots of pictures and share them with you when I get back.

Have a great Memorial Day weekend!!!

Saturday, April 14, 2012

Saturday Projects-Button Art

I thought it would be fun to post projects that I sometimes make on my Saturdays off. It may not post things every Saturday but, I do what I can. I have another project to post next week and probably the week after that too. I thought that I'd call it something simple like. . . Saturday Projects! I know, I know. . . very original, lol. . . but it works for me.

This weeks Saturday Project from a few weeks ago is one I did for my daughter's newly painted and carpeted room. Her room is next door to my new sewing room so she also benefitted from the flood.

When she saw the button letter that I made for my room she begged me to make a blue one for her room. For those that are on PINTEREST this is nothing new. It's actually been a popular PIN on PINTEREST and I've seen a lot of versions along my pinning path. So, here's my version of the Button Art Letter.


For those that have a name that starts with the letter K. . . you will be very happy to know that you are welcome to pin any of the K's in this post. You have my blessing. . . PIN AWAY!!!


Steps for Making Your Own Button Art Letter:
  • Buy an 8"x 10" or a 5" x 7" Picture Frame.
  • Pick a Font. I used Adobe Garamond Pro Bold.
  • Enlarge the letter in a word processing program to fit within the size picture frame opening. I like to BOLD the letter to make it thick and chunky. Print your letter on plain printer paper.
  • Use a light box and lay your printed letter on top of the light box. Then center a piece of blank Bazzill or cardstock (that has been cut to the size of your frame) on top of the printed letter. Tape edges of the paper so it doesn't slip or slide.
  • Now comes the fun part. . . pour out your buttons and pick and choose what size, shape, and color you want to use. I also used self-sticking gems and pearls from the scrapbooking section of the craft store to fill in the blank spots.
  • Place your buttons within the lines of the letter a few at a time to preview how the buttons look. When you're happy with their position pick up one button at a time and use glue dots to stick them in place, that way they are easier to (gently) pull off and reposition.
  • Continue the process until all your buttons are in place.
  • Finish by putting your button art in the frame.

Here's a closer look.


Display your Button Art in your favorite spot.
My daughter's frame sits on the bookcase by her bed.


I hope you enjoyed this Saturday Project.

Great Question from Diane E W:
Do you use the glass from the frame?

The Answer:
No, you don't use the glass.
It won't fit over the buttons and fit in the frame at the same time.

Also, here is a great LINK to buy buttons in bulk. It's called Buttons Galore & More. I've bought their buttons several times and I've been really happy with their service and the choice of button colors and shapes, etc. Go check out their website you will see lots of great buttons.

Saturday, April 7, 2012

Saturday Projects-Bike Basket

Yesterday was my daughter's birthday and it actually SNOWED most of the day. She was kind of bummed out by that, but TODAY. . . I think Spring has finally come to our neck of the woods as evidenced from the daffodils in my neighbors garden.


All my daughter wanted for her birthday besides a few spring/summer clothes is a new bike. She loves to bike with her friends and the summers are spent riding about and enjoying the lazy days of summer. She's always wanted a basket on her bike and we found this smart duo at a local bike shop. The only thing missing thing was a basket liner which I made this morning.

Isn't it just adorable?


The fabric we actually found at IKEA and the blue fleece was a blanket (also from IKEA) that cost a mere $2.49. We were super excited and bought 2 yards of the floral print that cost $3.99 a yard. What a deal!!! My daughter's friend has the same bike in a different color and I just measured the basket liner that she bought with her bike.

I started cutting and sewing soon after I got up this morning. I couldn't believe how quickly it sewed up. I love how it turned out. I may have to make a few more, they're just so cute!


This is our cat Sneakers. He just turned one year old in March and he was our daughters birthday present last year. Since he's an indoor cat he can only go outside on a harness and with some supervision. He's a special breed of cat that you wouldn't want to lose. Anyway, he loved sitting in the basket and going for a bike ride and my daughter was in heaven. We tied his leash attached to the harness to the handle bars so he wouldn't jump out but, we didn't have to worry as he sat there perfectly and sniffed the fresh air and soaked in the sunshine. He LOVED it!!!


Here they are riding around the neighborhood.
They are so happy to be outside on this glorious spring day.


Stopping for a little snuggle.


I love how his paw is hanging out of the basket.


Hope your Saturday Projects are as fun as ours.


Now I'm headed out to do my Easter Shopping.