Showing posts with label Fun Ideas. Show all posts

Saturday, May 26, 2012

Saturday Projects-Bridal Bouquet

I'm sure someone has been missing me and I wanted to check in before we fly out to New Zealand this evening for my daughter's wedding. About a year ago she met a young man and fell in love. The wedding is June 1st in the Hamilton New Zealand LDS Temple. We will enjoy meeting up with family and friends as we celebrate this joyous moment for Chip and Ariel. They have waited a long time for this day to come.

My daughter's favorite color is RED. . . go figure. . . she must be her mother's daughter. . . lol. Well, Ariel know's how crafty her mother is and she asked me to make her bridal bouquet out of handmade flowers. Well, I just so happen to have a PINTEREST board of fabulous flowers. Some of which I modeled my flowers after.


I will be doing a tutorial on the Ribbon Daisy Flowers that you see in the bouquet. They are the flowers with the red or glass buttons for the centers.


I made Organza Flowers, Organza Roses, Wool Felt Flowers, Ric Rac Flowers, and Ric Rac Roses.
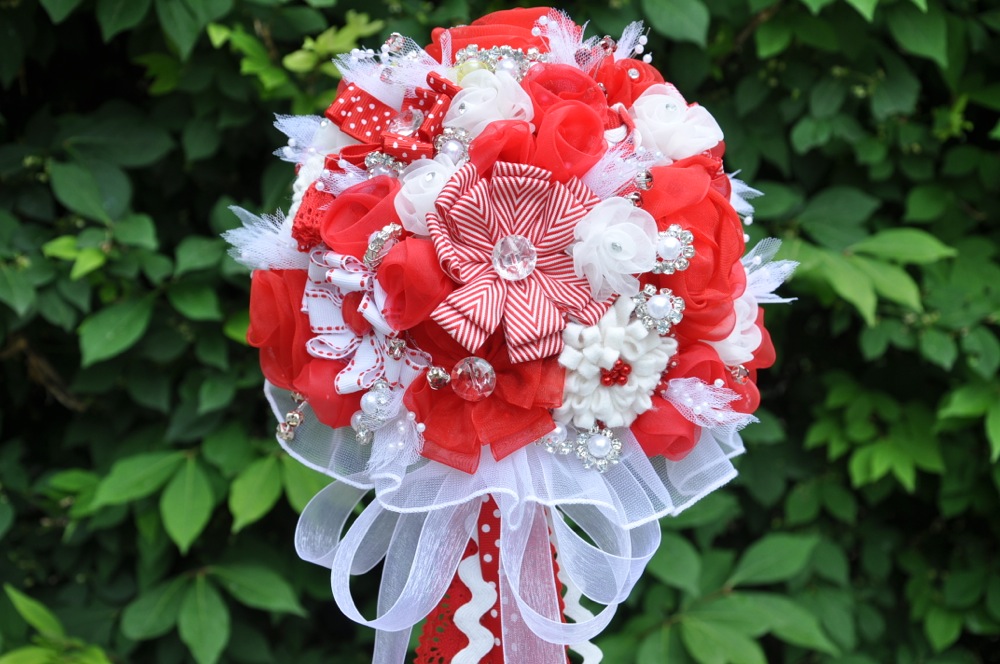

I also made a visit to Hobby Lobby to buy a few fillers like tulle and pearl picks. I also made a few other pics using vintage pearl flowers and red jewels that I also found at the store.


I love how it turned out and can't believe how pretty it is.


Ariel loves it and the bouquet will look darling with her Vintage Wedding Dress that she found while shopping at a Vintage Shop in Seattle Washington.


I thought you'd like a closer look.


Here's a picture of the soon to be wed couple!

I know it's a more serious look but they had a 10 minute photo shoot in New Zealand while she was there for 10 days and they only got a few pictures together. They couldn't  do retakes because she was leaving the next day!! You will bet that I will be taking TONS of pictures at the wedding. I will be so annoying that it will drive them crazy~!! But, they will be so grateful in the end.

Chip and Ariel


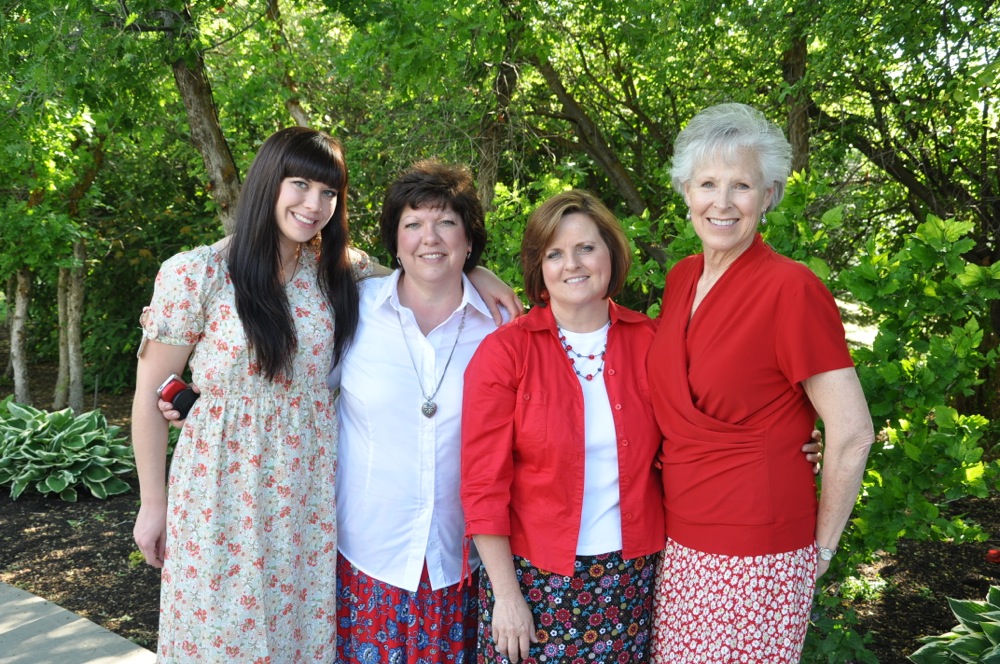
Here's a picture that was taken at the Bridal Shower.
(L to R) Ariel, Me, Eileen, Susan

Thanks Eileen, Susan, Lorie, Meg, and Denise for a beautiful Bridal Shower!

Well, I'm off!!! My last day of school was yesterday and I am sooo READY for some time away. Once the wedding is over we will have two more weeks to travel around and enjoy our time together. I wish we could take all of our family but just 3 of us are going. Myself, my husband, and my youngest daughter, McKenna. She's really excited but really nervous about the long flight and being away from her home, her family. her cat, and her friends. I keep reminding her that I'm going with her and that we will have the time of our lives, and it will be a great experience for her. I know her older sister would go in a heartbeat but she just had a baby two weeks ago. I will take lots of pictures and share them with you when I get back.

Have a great Memorial Day weekend!!!

Saturday, April 7, 2012

Saturday Projects-Bike Basket

Yesterday was my daughter's birthday and it actually SNOWED most of the day. She was kind of bummed out by that, but TODAY. . . I think Spring has finally come to our neck of the woods as evidenced from the daffodils in my neighbors garden.


All my daughter wanted for her birthday besides a few spring/summer clothes is a new bike. She loves to bike with her friends and the summers are spent riding about and enjoying the lazy days of summer. She's always wanted a basket on her bike and we found this smart duo at a local bike shop. The only thing missing thing was a basket liner which I made this morning.

Isn't it just adorable?


The fabric we actually found at IKEA and the blue fleece was a blanket (also from IKEA) that cost a mere $2.49. We were super excited and bought 2 yards of the floral print that cost $3.99 a yard. What a deal!!! My daughter's friend has the same bike in a different color and I just measured the basket liner that she bought with her bike.

I started cutting and sewing soon after I got up this morning. I couldn't believe how quickly it sewed up. I love how it turned out. I may have to make a few more, they're just so cute!


This is our cat Sneakers. He just turned one year old in March and he was our daughters birthday present last year. Since he's an indoor cat he can only go outside on a harness and with some supervision. He's a special breed of cat that you wouldn't want to lose. Anyway, he loved sitting in the basket and going for a bike ride and my daughter was in heaven. We tied his leash attached to the harness to the handle bars so he wouldn't jump out but, we didn't have to worry as he sat there perfectly and sniffed the fresh air and soaked in the sunshine. He LOVED it!!!


Here they are riding around the neighborhood.
They are so happy to be outside on this glorious spring day.


Stopping for a little snuggle.


I love how his paw is hanging out of the basket.


Hope your Saturday Projects are as fun as ours.


Now I'm headed out to do my Easter Shopping.

Wednesday, June 29, 2011

Magnetic Button Ring Tutorial


I was recently invited by Madame Samm to do a guest post at Stash Manicure. So, I decided it was time to make another tutorial for everyone. Make sure to visit Stash Manicure to see the tutorial, learn how to make a Magnetic Button Ring, and to leave a comment because I will be picking a winner from those who leave a comment @ Stash Manicure. I'm also going to pick a second winner from those that leave a comment here on my blog.

The PRIZE will be ONE Magnetic Button Ring (for each blogs winner) You may pick either red or black.

You will have until Midnight on Saturday, July 2nd to leave your comments.

Update Information:
Several people have asked where to buy the products. I want to remind you to click on the links that I've provided in the tutorial and it will take you to i-Tops Website where you can click on the STORE LOCATOR button that will take you to a map. Then Click on the STATE that you live in and it will take you to a list of places in your STATE that sell the i-Top products. Also I did a search on google and here are a few other links where to can buy the product onlineHERE and HERE. You will also want to watch the Imaginesce video HERE.

You will also see that there are videos on the IMAGINESCE (i-Top) website. Also, one other thing- When I taught how to use their products at a quilt retreat my local quilt shop contacted Imaginesce directly (maker of i-top products) and purchased them at wholesale for the retreat.

Monday, April 25, 2011

Fluffy Stuffy Bunnies

Spring has been SLOWLY making it's way to Utah with varied kinds of weather from Snow to Rain to Sunshine and tonight we even had some Thunder! Hilarious, I know! I think we are definitely READY for some SUNNIER DAYS!

Anyway, the bunnies have been hippity hopping around the house and have been begging for a photo shoot. So, without further ado. . .

Here are a few of the bunnies I've been making for Springtime. . .


If you've fallen in love with the Fluffy Stuffy BUNNIES like I did. . . you can find the FREE Bunny pattern HERE and the FREE Bunny Dress Pattern HERE! They are so cute you will want to leave them out all year long.

This wonderful tutorial was created by the FAMOUS Jennie B. Harris of ALLSORTS. She is a very talented designer and artist with many credits to her name. Also, she recently designed an interactive children's book that you can download to your iPad. The information can be found on her blog HERE! You can also go to Apple's APP store and download the book. It's called "Bunnyfur's Easter Eggs" Go HERE to download it.

FYI: Just in case you're wondering. Yes. I did change the pattern slightly by adding bias binding to the neckline of the dress and left the top edges of the dress open for turning and then the raw edges are sewn into the binding.

I made the flower that you see clipped on the Bunny's ear using Felt and one of my favorite flower dies that I cut out using my Sizzix Die Cut Machine. I also made the covered buttons that screw onto a hair clip.

I almost forgot to tell you that I got the cute little plastic pots/cups at BIG LOTS for a $1.00 a piece. They looked like they could pass for little baskets to hold my Bunnies in and they came in lots of pretty colors. I also put candy in the eggs and wrapped the baskets in clear cellophane wrap that I tied at the top with a pretty bow.

Thursday, March 17, 2011

Leprechaun Traps

Did you miss me? I missed me too. lol. I will have to explain later but right now I want to say Happy St. Patrick's Day and share with you a few pictures I took today at school. The 1st graders have been working at home on their Leprechaun traps and yesterday they all brought them to school to see if they could catch a few of them during the night last night. They all came to school really excited to see if any of them had caught a Leprechaun. Some of the kids thought they had seen glimpses of Leprechauns during the week and a few kids even found a few notes in the classroom from the Leprechaun. It's been fun watching their excitement grow as we learned about Leprechauns these past couple weeks.

This first trap was made by the student I shadow. He told me that the Leprechaun climbed up the ladder to propose to the girl Leprechaun and when he stepped off the ladder he would fall into the trap. If you see the open area on top of the box, that's the viewing area where you can look in and see the Leprechaun. I thought it was a very clever trap and it made me smile and giggle as he told me how his trap worked. Very Cute!!


When the Leprechaun climbs up the ladder and stops off to get the gold he falls through the slit in the top of the hat. The slit is camouflaged by the gold coins.


I love how this one is decorated with a double rainbow and it's own little pot of gold that hides a trap door that drops him into the fake hillside below the pot.


The Leprechaun climbs the ladder even though there are warning signs telling him to stay off the ladder. lol. Of course, he falls in when he steps off the ladder.


Another trap door. Watch out!!!


This trap has a door that triggers shut when the Leprechaun steps over the threshold.


The lid of this trap falls on the Leprechaun and traps him inside the box.


When the Leprechaun reaches for the gold dangling from the string he falls into the pit. The other trap is camouflaged by glitter and gold strewn about the VERY sticky paper and traps the Leprechaun when he makes his move toward the pot of gold.


I love the instructions on the sign that says. . .
"Go up the ladder and you will see gold. Trust me. I NEVER LIE!!! lol.


Here is a sampling of the Green Treats that each of the kids brought to the St. Patrick's Day Celebration. Lots of sugar, some grapes, and there was even broccoli, although I don't see it on this particular plate, hehehe. I thought the apple juice was a great idea, too!!


I hope you enjoyed our little tribute to St. Patrick's Day.

Tuesday, December 21, 2010

Quick & Easy Tissue Holder Tutorial


This quick and easy tutorial makes 6 Kleenex Tissue Holders out of a small amount of three different fabrics. I love making these for friends and neighbors as little thank you gifts or to add to a bigger gift. I have one in my purse and one in my church bag.

What You Will Need:
  • 7" of fabric for outside of tissue holder
  • 7" of fabric for inside of tissue holder
  • 6" of fabric for binding on tissue holder
Cutting Instructions:
  • Cut one strip of outside fabric measuring 6" x width of fabric
  • Cut one strip of inside fabric measuring 6" x width of fabric
  • Cut two strips of binding fabric measuring 2 1/2" x width of fabric


Sub-Cutting Instructions:
  • Sub-cut outside fabric into 6 rectangles measuring 6" x 6 1/2"
  • Sub-cut inside fabric into 6 rectangles measuring 6" x 6 1/2"
  • Sub-cut binding fabric into 12 rectangles measuring 2 1/2" x 6"


Sewing Instructions:

1. Take one inside fabric and one outside fabric measuring 6" x 6 1/2" and place them with the wrong sides together.
2. Repeat process for the remaining 6" x 6 1/2" rectangles making a total of 6 sets.
3. Take the twelve 2 1/2" x 6" strips fold in half and press with wrong sides together.
4. Using a 3/8" seam allowance sew two binding strips with one on each 6" side of the tissue holder.


5. Press binding fabric outward on both sides of tissue holder.


6. Fold the binding up and over to the back of each tissue holder and stitch in the ditch.


7. Repeat on the opposite sides of each tissue holder.


8. Fold tissue holder in half with the right sides together.
9. Press the corners. This is the center.


10. Fold binding edges into the pressed center mark and pin in place. Make sure the outside fabric is in the inside as seen in the picture below.


11. Using a 1/4" seam allowance sew both sides of the Tissue Holder closed. I like to backstitch at the beginning, the end, and over the opening to make sure it's really secure.


12. Finish the inside seams with a serger. If you don't have a serger that's okay. Just use a zigzag stitch on your sewing machine.


13. Turn the tissue holders right side out making sure to push out the corners.
14. Press the tissue holders and you are done!

Kleenex Tissue Holders
~1 for you and 5 friends~