Showing posts with label Pincushions. Show all posts

Thursday, January 10, 2013

2013 Pincushion Club

Ok...okay...before I get started I have to admit that I am horrible at blogging ever since Google Reader, Facebook, Flickr,  Pinterest and Instagram have entered my life. I just don't have enough time to do justice to everything but, stick with me, I will keep trying to blog when I find a moment and have a picture or two to share. So. . . on to the fun stuff. . .

BIG ANNOUNCEMENT!!!

I'm announcing here on my BLOG that I will be teaching a monthly Pincushion Class at JUST SEW. So, if you live close by you may be interested in checking it out. You don't have to commit to a whole year but you can sign up for the pincushions you're interested in making.

Here are the details:
  • Where: Just Sew located in Highland, Utah
  • Date: 3rd Saturday of each Month
  • Time: 9:00 a.m.

Class sizes will be limited to 10 people due to limited classroom space. 

Here's a preview of some of the pincushions we'll me making:
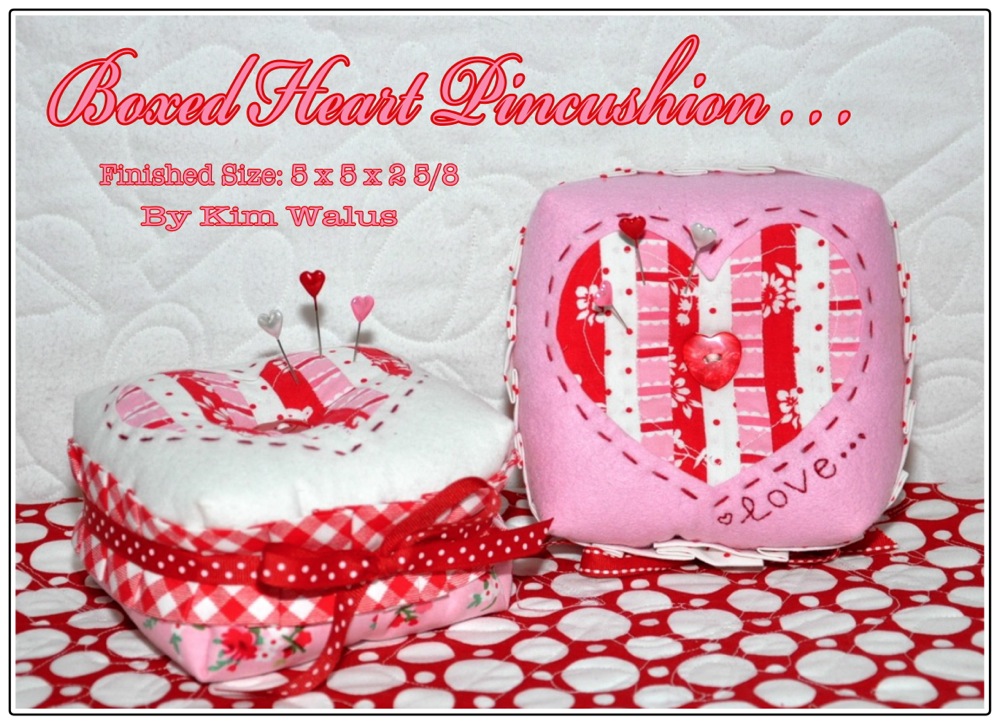
2013 Pincushion Club
January's Pincushion

A closer look.

First 3 months of Pincushions.
2013 Pincushion Club at Just Sew.


One More Look!

I love all of the pincushion inspiration you can see on my pinterest pincushion board. I have so many ideas and love creating things. Here's a little look ahead at what I'm working on for the month of May. I love flowers and I love Mother's Day so what better way to pay tribute to my MOM than making a Potted Flower Pincushion!

Just a little note: If you don't know. . . I love itty bitty things and always have. . . So. . . when I had this design running through my head I knew it had to be on the itty bitty side of things. It stands just 4.5" tall from the base of the pot to the top of the flower. It turned out just how I saw it in my head!

I'm also playing around with making one a bit bigger, not much, but a bitty bit bigger!


Well, it's late now and I must start to wind down and go to bed early. I've been keeping too many late late nights all in a row. It just makes it really hard to get moving in the morning. **tired sigh**

Here's a belated Happy New Year to EVERYONE!!! Thanks for all of your talents, inspiration, creativity, and commitment to the craft of sewing, quilting, crocheting, knitting, and creating!!! You all make such wonderful projects. I could spend more hours than I have being inspired by what EACH of YOU CREATE!!!!

Also, I want you to know that I'm still alive and well. My blogging will just have to continue to be sporadic until I retire from working full-time but, I hope you will check in on occasion and leave a comment so I know you were here. I miss hearing from so many of YOU. . . my Quilting Friends.

Monday, August 6, 2012

Great Granny Pincushion Tutorial

It's been so much fun seeing all of the blocks and finished quilts over at the Great Granny Along
and I've been so inspired by everyone that I wanted to reduce the block and make a pincushion.

So today, I pushed off cleaning the house and made a itty bitty Great Granny Pincushion instead. It's much more fun creating than cleaning. I'm just putting off the inevitable and will need to get some cleaning done before I go back to work in a couple weeks.

Anyway, I started thinking that maybe all of you would like to make a pincushion too. . .

So. . .

I put together a little tutorial on how to make your very own Great Granny Pincushion.

First off, the directions for making the block are exactly the same directions I used to make my miniature block. Go check out Lori Holt's Tutorial HERE. The only difference in the blocks is the size of the squares and the rectangles. I also added the instructions for putting together the pincushion.

Not only can you make a pincushion but, you could also make:
  • More blocks and make a small doll quilt (I'm thinking I need to make a doll quilt too).
  • Make the block into a Mug Rug to use by your sewing machine or on your cutting table.
  • Frame the block and hang it in your sewing or craft room.
So, enough talking and on to the Tutorial. Here it is. . .

NEWS FLASH!!!
I had a great epiphany early this morning that I wanted to share with you!

I'm sure many of you collect CHARM PACKS. . . Am I right?

Well, I realized this morning that you could also just use 4 charm squares from any Charm Pack to make the pincushion! When I did the math in my head I realized that you can get SIXTEEN (16) 1 1/4 inch squares out of each 5 inch Charm Square. Isn't that cool? Just another way to use all of those amazing Charm Packs you have laying around. Although, I do find it hard to open them up and actually use them. lol.


The Great Granny Pincushion
Finished Size: 5x5 inches

Pincushion Supply List:
  • Four different prints for the block
  • White Fabric for the block background
  • 5" x 5" Acrylic Ruler (Similar to the "Dear Jane" Ruler)
  • Pincushion Filler (I used crushed Walnut Shell)
  • Thread
  • Buttons

Cutting List:

Out of Multi-Colored Fabric:
  • Cut 1 Square @ 1.25 x 1.25" for Baby Center
  • Cut 4 Squares @ 1.25 x 1.25" for Mama Round
  • Cut 8 Squares @ 1.25 x 1.25" for Granny Round
  • Cut 12 Squares @ 1.25 x 1.25" for Great Granny Round
  • Cut 2 Squares @ 5" x 5" for Pincushion Back
  • Cut 1 Strip @ 1.25" x width of Fabric for Binding

Out of White Fabric:
  • Cut 12 Rectangles @ 1.25" x 2" for end of rows
  • Cut 4 Rectangles @ 1.25" x 2 1/4" for the corners
  • Cut 1 Square @ 5" x 5" for Pincushion Lining


Instructions:

1. Make one Great Granny Block following these instructions.


2. Use a 5"x5" ruler similar to the "Dear Jane" ruler you see in the picture below.


3. Center the Ruler and trim off the excess.


4. Take the two 5" squares for the pincushion back and press one square in half.


5. Place right sides together with the pressed square on top.


6. Sew along the pressed line leaving a 1.5" gap then continue sewing to the opposite edge. Make sure to back tack where you stop and start the sewing.


7. Now fold the wrong sides toward each other to reveal the right sides of fabric.


8. The place where you didn't sew becomes the opening where you will fill the pincushion with the crushed walnut shells. Use a funnel to fill it up.


9. Now take the block, the white lining, and the backing. Then stack one square on top of the other.


10. Pin the layers in place.


11. Take the 1.25" inch strip and sew a single binding around the four edges.


12. Turn over your quilt and fold the edges toward the raw edges of the block.


13. Now fold the folded edge up and over to the back of the block. Press.


14. Turn the block over to the front and stitch in the ditch along the edge of the binding making sure the underside is sewn in at the same time.


15. Fill the pincushion with crushed Walnut Shell, using a funnel,  and fill to the desired density.

16. Place a small amount of batting inside opening to prevent filling from falling out, then stitch the opening closed.

17. Using heavy thread stitch a button to the center and pull tightly, then secure the thread and cut.

18. You're Great Granny Pincushion is done. Now, how about making another one for a friend?

I hope you've enjoyed this tutorial and if you have any questions feel free to send me an email. Remember, I love comments! So. . . feel free to leave as many comments as you like. It makes me feel good knowing that you like what I do. Yes...I'm fishing for compliments. lol.

Have a Great Day!!!

Saturday, July 21, 2012

Saturday Projects-Blog Button

Here's my new Blog Button. It's been a long time coming but I finally found something that I'm proud of and willing to use to advertise my blog.

I'm still trying to figure out the html stuff and I can't get my picture to come up so I'm going about it another way. I've read a few blog posts about creating buttons but it's just not my expertise. So, I will continue to fumble in the dark and have a stab at it.

Wish me luck!

Here's my blog button and when you see it on the sidebar of my blog that mean's I succeeded! lol.

Update: I think I did it. You'll see my button on the sidebar! Yippee! I used this blog tutorial that really helped me out. Thanks to Somewhat Simple's Blog Post called Blogging 101-How to Make a Button

2nd Update: I got the dang button to work but it doesn't seem to link back to my page. HELP!!! If you can help me out then just give me a holler! I've followed the directions repeatedly to make sure I got it right. It looks right but doesn't want to link. I tested it on my family blog and it shows up just fine but doesn't link over. I finally resorted to adding a picture gadget and then adding the link.


I've been inspired by all of the Pincushion Jar's on Pinterest and when I found these jars at Hobby Lobby I knew I had to have them. They are the cutest shape and came in 4 sizes. I pick 3 of the 4 different sizes and took them home with me.


The metal tag I made using my dies and art metal. You can find a link to my blog post about how to do it and where to get the stuff you need to do it HERE. You can link to all four parts of the tutorial from there.


The biggest jar in the center is my little sewing kit jar and the smallest jar holds a few of my buttons. The medium jar holds my collection of HEART buttons.


Aren't they just adorable together?


I hope you enjoyed this Saturday Projects Post!

What have you been creating today?

Sunday, March 18, 2012

Bitty Bowl of Pins Tutorial Part 3 & 4


Part 3 of the Bitty Bowl of Pins Tutorial.

Let's begin by cutting a 3/8" strip of silver metal.

The metal is a bit heavier than heavy tinfoil.
I just used a ruler and one of my older blades.
It cuts easily with no problem at all.


Then cut the 3/8" strip into 2" lengths.


Find the letter stamps for P, I, N, and S .

Line them up and tap letters on stamp pad and then stamp on a sticky note. This will be your stamping guide. Line the metal up with the stamped letters on the sticky note so that the letters fall in the center of the metal as seen in the picture below.


Now take the first letter P and lightly tap the top of the metal stamp with a hammer. You really don't have to hit very hard as the metal is very soft. You can practice on a piece of scrap metal to get a feel for how hard you will want to hit the the metal stamp. Continue the process with the remaining 3 letters, I, N, and S.


Using your rotary cutter (with an old blade) cut just a snippet of metal off each corner at an angle.


You have two choices for the metal rivots on each side of the PINS letters. On the original pincushion I used silver brads and an 1/8" hole punch as seen in the picture below.

Or you can use the a silver iRock gems. They are attached using the heated application tool as seen in the picture below.


The letters are made black by filling in each letter with a sharpie pen. Then rub off any excess with a scrap of batting.


Attach mini glue dots to the back of the metal sign.


Now attach the metal PINS sign to the porcelain bowl
Press and rub edges to mold the metal to the bowl.


Bitty Bowl of Pins Tutorial Part 4

Consists of gluing the pincushion into the bowl.

I used hot glue and applied it to the inside of the porcelain bowl and then pushed the fabric pincushion into the glue and did any quick adjusting before the glue set. Hold your hand over the pincushion and firmly hold in place until the bowl cools off.


Your Pincushion is now complete!

I do hope you enjoyed this little adventure with me.

Have a great week!

Here are the Links for Part 1 & 2


Monday, March 5, 2012

Bitty Bowl of Pins Tutorial Part 2

Here is Part 2 of the Bitty Bowl of Pins Tutorial. I hope you were able to locate the supplies to make this little project. Remember though that you can use any fabric to make this pincushion.

I will have to make a few pincushions out of other fabrics to inspire you.


Well let's get started.

Here's a picture of what you'll need.


Cut your piece of fabric to measure 4.5"x9.5"

Fold the short ends (5") together.

Sew right sides together using a 1/4" seam allowance.

Press the seams open.


Pull a length of quilting thread from the spool measuring about 36" long.

Thread needle and knot one end.

Measure down a 1/4" and sew a running stitch around one raw edge of the fabric.


Pull the running stitch tight to pull the fabric in.


Wrap the thread around the gathered fabric.

Secure the thread, tie a knot, and cut the end of the thread.


Turn fabric right side out.

This will become the top of your pincushion.


Stand it up.

Here's a view looking in.


Fold the top edge down 1/2" and press.

Sew another running stitch close to the top edge of fold line.

Pour in a generous 1/2 cup of crushed walnut shells.


Put in a little stuffing to prevent the crushed walnuts from leaking out.

Pull running stitch tight.

This is the point that you will make any adjustments to how full and
how tight you want your pincushion.

You don't want it too tight because you need to mold it to fit into your bowl.

Just take out or add to it before you sew up the end.

Sew opening closed by criss crossing the thread from side to side across the pincushion.

Secure thread, knot, and cut off the end of the thread.


Cut off a piece of crochet thread measuring about 20"

Thread a long needle matching ends of thread.

Insert needle at bottom of pincushion pushing through to the top.

Then thread through one side of a two hole button and then through the other side of button and down again into the pincushion and out through the bottom of the pincushion.

Tie 2-3 knots in your crochet thread then cut tails within about an inch of knots. You may place a bit of glue on the knot to keep it secured. Do not cinch your thread too tightly as you will want a bit of give when you smush it in your bitty little bowl.


Turn it over to see your finished pincushion.


I've made two pincushions, so far.

Don't they look cute together?


Click HERE to go to the
Bitty Bowl of Pins Tutorial Part 1- Supply List

Click HERE to go to the
Bitty Bowl of Pins Tutorial Part 3 & 4-
Stamping the Metal and Finishing the Bitty Bowl of Pins
Coming Soon!