Showing posts with label My Designs. Show all posts

Thursday, January 10, 2013

2013 Pincushion Club

Ok...okay...before I get started I have to admit that I am horrible at blogging ever since Google Reader, Facebook, Flickr,  Pinterest and Instagram have entered my life. I just don't have enough time to do justice to everything but, stick with me, I will keep trying to blog when I find a moment and have a picture or two to share. So. . . on to the fun stuff. . .

BIG ANNOUNCEMENT!!!

I'm announcing here on my BLOG that I will be teaching a monthly Pincushion Class at JUST SEW. So, if you live close by you may be interested in checking it out. You don't have to commit to a whole year but you can sign up for the pincushions you're interested in making.

Here are the details:
  • Where: Just Sew located in Highland, Utah
  • Date: 3rd Saturday of each Month
  • Time: 9:00 a.m.

Class sizes will be limited to 10 people due to limited classroom space. 

Here's a preview of some of the pincushions we'll me making:
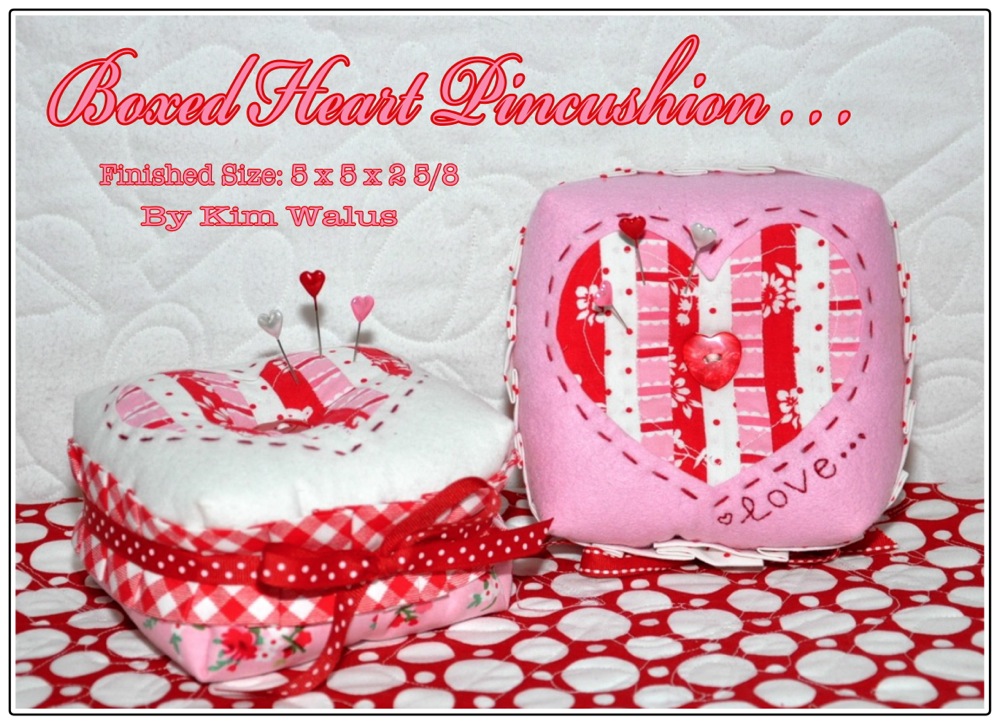
2013 Pincushion Club
January's Pincushion

A closer look.

First 3 months of Pincushions.
2013 Pincushion Club at Just Sew.


One More Look!

I love all of the pincushion inspiration you can see on my pinterest pincushion board. I have so many ideas and love creating things. Here's a little look ahead at what I'm working on for the month of May. I love flowers and I love Mother's Day so what better way to pay tribute to my MOM than making a Potted Flower Pincushion!

Just a little note: If you don't know. . . I love itty bitty things and always have. . . So. . . when I had this design running through my head I knew it had to be on the itty bitty side of things. It stands just 4.5" tall from the base of the pot to the top of the flower. It turned out just how I saw it in my head!

I'm also playing around with making one a bit bigger, not much, but a bitty bit bigger!


Well, it's late now and I must start to wind down and go to bed early. I've been keeping too many late late nights all in a row. It just makes it really hard to get moving in the morning. **tired sigh**

Here's a belated Happy New Year to EVERYONE!!! Thanks for all of your talents, inspiration, creativity, and commitment to the craft of sewing, quilting, crocheting, knitting, and creating!!! You all make such wonderful projects. I could spend more hours than I have being inspired by what EACH of YOU CREATE!!!!

Also, I want you to know that I'm still alive and well. My blogging will just have to continue to be sporadic until I retire from working full-time but, I hope you will check in on occasion and leave a comment so I know you were here. I miss hearing from so many of YOU. . . my Quilting Friends.

Tuesday, August 7, 2012

Great Granny Needle Book

Okay Ladies. . . I'm going a little bit crazy reducing and resizing the Great Granny Blocks. It's been so much fun and I just had to show you another little project I've been working on today. I've included the cutting list to make this Mini Great Granny Block but you're on your own when it comes to making the needle book. Tutorials can sometimes take longer to make than you think and right now I just don't have a lot of time. I have out of town family here for 10 days and then after that I have more company coming for another 5 days and then I go back to School on the 21st of August. If you need help though, let me know. I can answer just about any question you might have.

On the funny side of things. . .when I showed the itty bitty block to my husband he called it Molecular Quilting. I got a big laugh out of that and told him that you can't go too much smaller than this without the bits of fabric getting difficult to put through your sewing machine and not burning your fingers when pressing the seams.

Talk about itty bitty. . . each little square in the block measures 1/2 an inch by 1/2 an inch.

FYI: There are 41 pieces in the Great Granny Block.


Great Granny Needle Book
Finished Block Size: 3 1/8" x 3 1/8"  •  Finished Needle Book Size: 4" x 4"

Cutting List:

Out of Red Black & Grey Fabric:
  • Cut 1 Red Square @ 1" x 1" for Baby Center
  • Cut 4 Grey Squares @ 1" x 1" for Mama Round
  • Cut 8 Black Squares @ 1" x 1" for Granny Round
  • Cut 12 Red Squares @ 1" x 1" for Great Granny Round

Out of White Fabric:
  • Cut 12 Rectangles @ 1" x 1.5" for end of rows
  • Cut 4 Rectangles @ 1" x 2" for the corners

The instructions for making Great Granny Blocks
can be found @ Bee in My Bonnet.


I used White Bamboo felt for the fabric you stick the needles in and used


I used a red snap for the closure.

I also wanted to place the scissors and thread next to the needle book
so you could get a feel for how small the block really is.

The finished size of the the needle book is 4" x 4"


I hope you enjoyed seeing the Great Granny Needle Book.

Monday, August 6, 2012

Great Granny Pincushion Tutorial

It's been so much fun seeing all of the blocks and finished quilts over at the Great Granny Along
and I've been so inspired by everyone that I wanted to reduce the block and make a pincushion.

So today, I pushed off cleaning the house and made a itty bitty Great Granny Pincushion instead. It's much more fun creating than cleaning. I'm just putting off the inevitable and will need to get some cleaning done before I go back to work in a couple weeks.

Anyway, I started thinking that maybe all of you would like to make a pincushion too. . .

So. . .

I put together a little tutorial on how to make your very own Great Granny Pincushion.

First off, the directions for making the block are exactly the same directions I used to make my miniature block. Go check out Lori Holt's Tutorial HERE. The only difference in the blocks is the size of the squares and the rectangles. I also added the instructions for putting together the pincushion.

Not only can you make a pincushion but, you could also make:
  • More blocks and make a small doll quilt (I'm thinking I need to make a doll quilt too).
  • Make the block into a Mug Rug to use by your sewing machine or on your cutting table.
  • Frame the block and hang it in your sewing or craft room.
So, enough talking and on to the Tutorial. Here it is. . .

NEWS FLASH!!!
I had a great epiphany early this morning that I wanted to share with you!

I'm sure many of you collect CHARM PACKS. . . Am I right?

Well, I realized this morning that you could also just use 4 charm squares from any Charm Pack to make the pincushion! When I did the math in my head I realized that you can get SIXTEEN (16) 1 1/4 inch squares out of each 5 inch Charm Square. Isn't that cool? Just another way to use all of those amazing Charm Packs you have laying around. Although, I do find it hard to open them up and actually use them. lol.


The Great Granny Pincushion
Finished Size: 5x5 inches

Pincushion Supply List:
  • Four different prints for the block
  • White Fabric for the block background
  • 5" x 5" Acrylic Ruler (Similar to the "Dear Jane" Ruler)
  • Pincushion Filler (I used crushed Walnut Shell)
  • Thread
  • Buttons

Cutting List:

Out of Multi-Colored Fabric:
  • Cut 1 Square @ 1.25 x 1.25" for Baby Center
  • Cut 4 Squares @ 1.25 x 1.25" for Mama Round
  • Cut 8 Squares @ 1.25 x 1.25" for Granny Round
  • Cut 12 Squares @ 1.25 x 1.25" for Great Granny Round
  • Cut 2 Squares @ 5" x 5" for Pincushion Back
  • Cut 1 Strip @ 1.25" x width of Fabric for Binding

Out of White Fabric:
  • Cut 12 Rectangles @ 1.25" x 2" for end of rows
  • Cut 4 Rectangles @ 1.25" x 2 1/4" for the corners
  • Cut 1 Square @ 5" x 5" for Pincushion Lining


Instructions:

1. Make one Great Granny Block following these instructions.


2. Use a 5"x5" ruler similar to the "Dear Jane" ruler you see in the picture below.


3. Center the Ruler and trim off the excess.


4. Take the two 5" squares for the pincushion back and press one square in half.


5. Place right sides together with the pressed square on top.


6. Sew along the pressed line leaving a 1.5" gap then continue sewing to the opposite edge. Make sure to back tack where you stop and start the sewing.


7. Now fold the wrong sides toward each other to reveal the right sides of fabric.


8. The place where you didn't sew becomes the opening where you will fill the pincushion with the crushed walnut shells. Use a funnel to fill it up.


9. Now take the block, the white lining, and the backing. Then stack one square on top of the other.


10. Pin the layers in place.


11. Take the 1.25" inch strip and sew a single binding around the four edges.


12. Turn over your quilt and fold the edges toward the raw edges of the block.


13. Now fold the folded edge up and over to the back of the block. Press.


14. Turn the block over to the front and stitch in the ditch along the edge of the binding making sure the underside is sewn in at the same time.


15. Fill the pincushion with crushed Walnut Shell, using a funnel,  and fill to the desired density.

16. Place a small amount of batting inside opening to prevent filling from falling out, then stitch the opening closed.

17. Using heavy thread stitch a button to the center and pull tightly, then secure the thread and cut.

18. You're Great Granny Pincushion is done. Now, how about making another one for a friend?

I hope you've enjoyed this tutorial and if you have any questions feel free to send me an email. Remember, I love comments! So. . . feel free to leave as many comments as you like. It makes me feel good knowing that you like what I do. Yes...I'm fishing for compliments. lol.

Have a Great Day!!!

Saturday, July 21, 2012

Saturday Projects-Blog Button

Here's my new Blog Button. It's been a long time coming but I finally found something that I'm proud of and willing to use to advertise my blog.

I'm still trying to figure out the html stuff and I can't get my picture to come up so I'm going about it another way. I've read a few blog posts about creating buttons but it's just not my expertise. So, I will continue to fumble in the dark and have a stab at it.

Wish me luck!

Here's my blog button and when you see it on the sidebar of my blog that mean's I succeeded! lol.

Update: I think I did it. You'll see my button on the sidebar! Yippee! I used this blog tutorial that really helped me out. Thanks to Somewhat Simple's Blog Post called Blogging 101-How to Make a Button

2nd Update: I got the dang button to work but it doesn't seem to link back to my page. HELP!!! If you can help me out then just give me a holler! I've followed the directions repeatedly to make sure I got it right. It looks right but doesn't want to link. I tested it on my family blog and it shows up just fine but doesn't link over. I finally resorted to adding a picture gadget and then adding the link.


I've been inspired by all of the Pincushion Jar's on Pinterest and when I found these jars at Hobby Lobby I knew I had to have them. They are the cutest shape and came in 4 sizes. I pick 3 of the 4 different sizes and took them home with me.


The metal tag I made using my dies and art metal. You can find a link to my blog post about how to do it and where to get the stuff you need to do it HERE. You can link to all four parts of the tutorial from there.


The biggest jar in the center is my little sewing kit jar and the smallest jar holds a few of my buttons. The medium jar holds my collection of HEART buttons.


Aren't they just adorable together?


I hope you enjoyed this Saturday Projects Post!

What have you been creating today?

Saturday, May 26, 2012

Saturday Projects-Bridal Bouquet

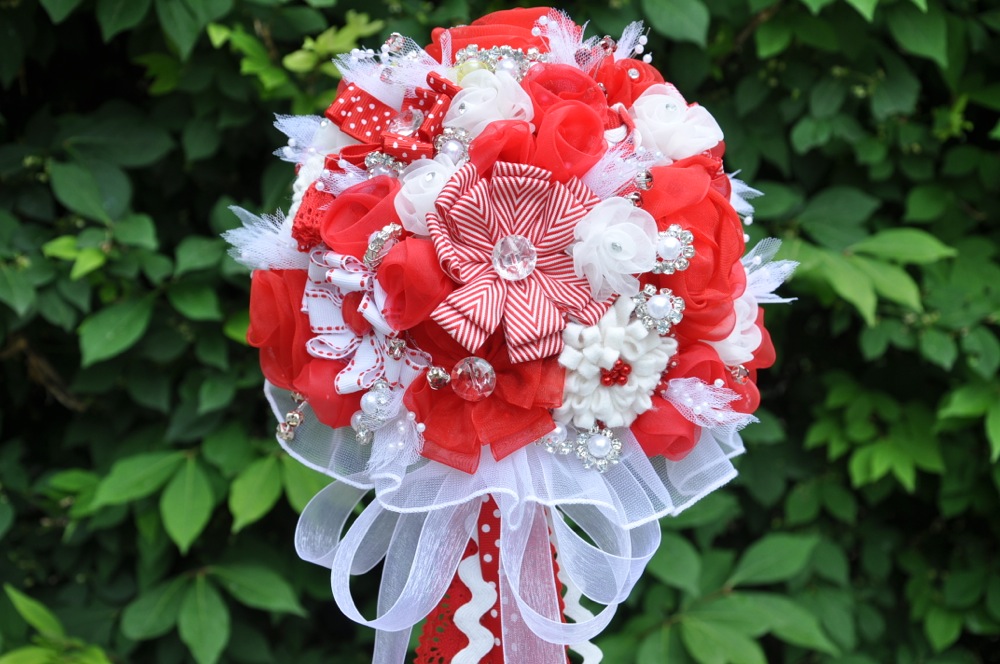
I'm sure someone has been missing me and I wanted to check in before we fly out to New Zealand this evening for my daughter's wedding. About a year ago she met a young man and fell in love. The wedding is June 1st in the Hamilton New Zealand LDS Temple. We will enjoy meeting up with family and friends as we celebrate this joyous moment for Chip and Ariel. They have waited a long time for this day to come.

My daughter's favorite color is RED. . . go figure. . . she must be her mother's daughter. . . lol. Well, Ariel know's how crafty her mother is and she asked me to make her bridal bouquet out of handmade flowers. Well, I just so happen to have a PINTEREST board of fabulous flowers. Some of which I modeled my flowers after.


I will be doing a tutorial on the Ribbon Daisy Flowers that you see in the bouquet. They are the flowers with the red or glass buttons for the centers.


I made Organza Flowers, Organza Roses, Wool Felt Flowers, Ric Rac Flowers, and Ric Rac Roses.


I also made a visit to Hobby Lobby to buy a few fillers like tulle and pearl picks. I also made a few other pics using vintage pearl flowers and red jewels that I also found at the store.


I love how it turned out and can't believe how pretty it is.


Ariel loves it and the bouquet will look darling with her Vintage Wedding Dress that she found while shopping at a Vintage Shop in Seattle Washington.


I thought you'd like a closer look.


Here's a picture of the soon to be wed couple!

I know it's a more serious look but they had a 10 minute photo shoot in New Zealand while she was there for 10 days and they only got a few pictures together. They couldn't  do retakes because she was leaving the next day!! You will bet that I will be taking TONS of pictures at the wedding. I will be so annoying that it will drive them crazy~!! But, they will be so grateful in the end.

Chip and Ariel


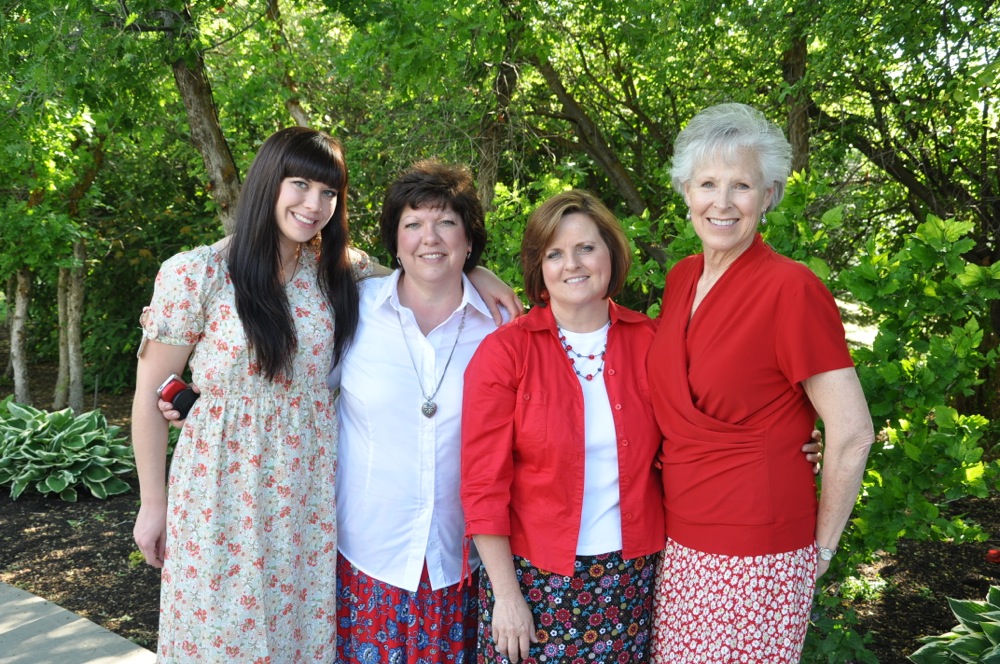
Here's a picture that was taken at the Bridal Shower.
(L to R) Ariel, Me, Eileen, Susan

Thanks Eileen, Susan, Lorie, Meg, and Denise for a beautiful Bridal Shower!


Well, I'm off!!! My last day of school was yesterday and I am sooo READY for some time away. Once the wedding is over we will have two more weeks to travel around and enjoy our time together. I wish we could take all of our family but just 3 of us are going. Myself, my husband, and my youngest daughter, McKenna. She's really excited but really nervous about the long flight and being away from her home, her family. her cat, and her friends. I keep reminding her that I'm going with her and that we will have the time of our lives, and it will be a great experience for her. I know her older sister would go in a heartbeat but she just had a baby two weeks ago. I will take lots of pictures and share them with you when I get back.

Have a great Memorial Day weekend!!!

Friday, April 20, 2012

Mixed Berries Quilt

Well, here she is. . .

My Mixed Berries Quilt!


The pattern is now available in the Summer 2012 Issue of
Quilts & More Magazine


If you would like to win a copy of Quilts & More
you still have time to enter my giveaway.

Go HERE to enter the giveaway.


I was at my local quilt shop on Wednesday (a few days ago) during my lunch hour and while I was checking out at the register I noticed the Quilts & More Magazine. It was my understanding that it would be available on April 24th so, you can imagine my surprise to find it so early!!!

Here are the two magazines that I will be giving away on April 24th.

Enter NOW to win a copy!


I'm also excited to tell you that you can purchase a KIT
for my Mixed Berries Quilt from. . .


Just click on the link above and it will take you right to the Fat Quarter Shop.

Hope you love it as much as I loved making it for you!

Saturday, April 14, 2012

Saturday Projects-Button Art

I thought it would be fun to post projects that I sometimes make on my Saturdays off. It may not post things every Saturday but, I do what I can. I have another project to post next week and probably the week after that too. I thought that I'd call it something simple like. . . Saturday Projects! I know, I know. . . very original, lol. . . but it works for me.

This weeks Saturday Project from a few weeks ago is one I did for my daughter's newly painted and carpeted room. Her room is next door to my new sewing room so she also benefitted from the flood.

When she saw the button letter that I made for my room she begged me to make a blue one for her room. For those that are on PINTEREST this is nothing new. It's actually been a popular PIN on PINTEREST and I've seen a lot of versions along my pinning path. So, here's my version of the Button Art Letter.


For those that have a name that starts with the letter K. . . you will be very happy to know that you are welcome to pin any of the K's in this post. You have my blessing. . . PIN AWAY!!!


Steps for Making Your Own Button Art Letter:
  • Buy an 8"x 10" or a 5" x 7" Picture Frame.
  • Pick a Font. I used Adobe Garamond Pro Bold.
  • Enlarge the letter in a word processing program to fit within the size picture frame opening. I like to BOLD the letter to make it thick and chunky. Print your letter on plain printer paper.
  • Use a light box and lay your printed letter on top of the light box. Then center a piece of blank Bazzill or cardstock (that has been cut to the size of your frame) on top of the printed letter. Tape edges of the paper so it doesn't slip or slide.
  • Now comes the fun part. . . pour out your buttons and pick and choose what size, shape, and color you want to use. I also used self-sticking gems and pearls from the scrapbooking section of the craft store to fill in the blank spots.
  • Place your buttons within the lines of the letter a few at a time to preview how the buttons look. When you're happy with their position pick up one button at a time and use glue dots to stick them in place, that way they are easier to (gently) pull off and reposition.
  • Continue the process until all your buttons are in place.
  • Finish by putting your button art in the frame.

Here's a closer look.


Display your Button Art in your favorite spot.
My daughter's frame sits on the bookcase by her bed.


I hope you enjoyed this Saturday Project.

Great Question from Diane E W:
Do you use the glass from the frame?

The Answer:
No, you don't use the glass.
It won't fit over the buttons and fit in the frame at the same time.

Also, here is a great LINK to buy buttons in bulk. It's called Buttons Galore & More. I've bought their buttons several times and I've been really happy with their service and the choice of button colors and shapes, etc. Go check out their website you will see lots of great buttons.

Tuesday, April 3, 2012

Sewing Room Makeover

I was a recent guest last week on Amber's blog A Little Bit Biased and wanted to make the same post here on my blog. For those that have already seen this post I'm sorry about the repetition but, for those who haven't seen it, enjoy!


SEWING ROOMS like QUILTS are always a work in PROGRESS.

I still have lots of things that got pushed to the storage room that I will have to go through later, things that need organizing, things I need to get rid of or donate. I still have curtains to make and my sewing chair needs to be recovered. I also need to paint my clock RED and find a rug for my floor. But for now, I am very very happy and pleased with the results as you will see from the pictures I've taken.

The before pictures were taken in June of 2009

Here's a glimpse of what things looked like before new flooring and new paint.
It was a process getting it to this point and I liked it a lot, but there was a lot of clutter and stuff everywhere. The old pinkie taupe carpet had to go. It was 13 years old and ugly!!!


The curtains are nice but they don't match my room anymore.
I have yet to make new ones.


My portable design wall is held up with push pins.


The MESS began after a flood in our basement which resulted in all new carpet and with new flooring comes new paint. It's kind of like the book "If You Give a Mouse a Cookie. . . he's going to want a glass of milk to go with it."

So, if you give a quilter a brand new wood floor. . . she's going to need a new paint color to go with it.

And that's how it all happened.

Lucky me!

Here's a look at the mess that I had to pull out of my room and store in various places like my daughter's bedroom. Luckily she's away at college. lol.


Thanks to my dear sweet husband, Mr. Bitty Bits, for painting and helping me move my crap from room to room to room as we prepared for the new carpet in the basement and the wood laminate flooring in my sewing room. He was a good sport but by the end we were exhausted. This all happened in October and it took us until just before Christmas to get it all back in order just in time for our Christmas company.


The after pictures were taken in February 2012


Here it is. . .


The


BIG


REVEAL!


The flooring is a beautiful charcoal grey wood laminate.
The paint is by Sherwin Williams and the color is "Knitting Needles"

Did you notice my DESIGN WALL with the SWOON block and four other little blocks on it?

Well, it's actually a Design Wall QUILT!! Yes, I created a Design Wall Quilt. The binding and the fabric I used matches the other quilt I made for my sewing room. I had my friend Kaylene quilt an overall sewing motif on the quilt.

I didn't want to just put up my old design wall which was basically a piece of plastic with flannel on it. I thought it would look tacky. I'm really pleased with how it turned out. The quilt is hung with clips that are attached to a rail system from IKEA.

Also, the wall unit is from IKEA along with the great storage boxes. It's quite a functional piece of furniture and holds a lot of my fabric and cute things.


I loved Amber's use of curtain rods for her wrapping paper and freezer paper so much that I decided to use them in my room. I used the second curtain rod for my grosgrain ribbons, ric rac, and organza ribbons. I really love having my favorite red polka dot wrapping paper and ribbons at my finger tips. Thanks Amber for that great tip! Here's the LINK to her post.

The two canvas prints are both from the Moda Girls of Sweetwater fame. Their blog is Sweetwater MAKE LIFE SWEET. I picked up one of the prints at Spring Market last year and the second one I bought recently at their online store. I matted them both in red cardstock and put them in a floating glass frame that I picked up at Target for $19.99.

The grey clock I also picked up at Target and plan on spray painting it a cherry red.


Here's a view of my cutting table which has remained in the same spot as in the before pictures. It's been a good place for it and I can access my things from both sides of the table. There are drawers on the front side and open storage boxes on the opposite side where I keep all of my plastic project boxes.

You can also see the smaller version of my Merry-Go-Round Quilt (Cover Quilt on the Feb 2012 American Patchwork & Quilting Magazine) hanging on the wall by the lamp. The only difference is that I used mini pinwheels in place of the posts.


Here's the backside of my cutting table where you can kind of see the open storage boxes. I also love the thimble pottery that I found at JoAnn's over a year ago. I think my friend and I bought every single one they had left. I have 3 different sizes and use them to store my tools, pens, pencils, markers, scissors, zippers and selvage scraps. They are one of my favorite finds. . . EVER!

Oh. . . Yes. . . here's another favorite find.

I found these containers at Target last year and I just knew I had to have them. I started out with about 4 containers and then it grew to 8. Now I have 16 of them. They were a little pricey and that's why I picked them up a few at a time. I don't regret buying them at all. They are a great way to store the things that I use all of the time not to mention how cute they make things look. Besides I just couldn't resist the RED lids.


Buttons!!!
I just adore buttons. . . and love seeing them in their cute containers!!!


Here is a view of my ironing board and more storage boxes. The picture was taken from the other side of my cutting table looking toward the door where you come into the room. The banner was made using my Hugs & Kisses Tutorial from the Moda Bake Shop. I thought it would be fun to use the letters in my blog name to hang in my sewing room. The big scissors are plastic and I happened to find them at the Dollar Store for just a $1. I've been looking for more of them and haven't found any since. I felt really lucky to find the only pair of RED scissors they had!


Here's a close up view of my wire shelf that I got years and years ago from Longaberger. I use it to hold my bottles, aprons, my favorite pincushion bunny from my friend Thimbleanna, my small Longaberger basket and my PEZZY fat quarters that I recently bought. If you need a bunny pincushion she sometimes has them to sell but if not she does have the pattern for sale in her store. Go HERE to buy the pattern.


I have one window in my sewing room and it provides a bit of light in the afternoon. That's the one down fall to my sewing room. It has very poor lighting. I hope to resolve that problem at some point with track lighting of some sort. Anyway, sometimes I can get a good picture in my room when the light is coming through the window in the afternoon. Here's a few pictures of my red chair and my favorite tall dresser that I keep fabric in along with other crafty things. It's a great piece of furniture. I LOVE my RED chair too!!!


My cute bear is from Gap and I bought him 12 years ago when my daughter was a baby. He's just so cute sitting there on two of my favorite quilts.


This quilt is a baby quilt that I made and taught a few years ago. It's a replica of an antique quilt that I bought at a local antique store call "Star Flower Mill" The squares are appliqued in the center of each white square.

My friend Kaylene quilted an amazingly intricate design on this small quilt.


I hope you enjoyed this inside look at my creative space. It's the very best part of my day when I can spend time in my sewing room. I don't get to sew as much as I'd like too, but come summer when I have time off from school, you will definitely find me down there almost every day of every week.

A little piece of advice. . .

Big or Small. . . Find a SPOT and MAKE it YOUR OWN!