Hi Everyone!
I'm excited to share my finished Great Granny Quilt but, first I thought I'd share a tip with you and a new green block that I decided to re-do before I show you the quilt. Of course, I can't prevent you from being as excited as I am and scrolling down to have a look but, that's okay. Scroll away, just make sure and come back to read about my great fabric tip.
So, here's my collection of 2.5 inch squares that I started 5 or 6 years ago. I can never remember the exact day but, it's been a long time now since I made my box of fabric squares.
Anyway, when I first saw the Great Granny Along I immediately pulled out my box of squares. It was a great resource of already cut 2.5 x 2.5 inch squares and while I was working on the Great Granny Along I actually added more squares to my box every time I cut new fabric for my blocks.
Supplies for Fabric Box Collection of 2.5" Squares"
- 12.5 inch Plastic Scrapbook Box
- Cereal Box Cardboard (fabric dividers)
- Variety of 2.5 x 2.5 inch square of fabric
Start Collecting 2.5 x 2.5 inch squares:
- Whenever you buy fabric cut a 2.5 inch strip off and then subcut it into 16 squares.
- Whenever you're cutting fabric for a quilt project just cut an extra 2.5 inch strip and then subcut it into 16 squares.
- Whenever you have any leftover scraps just cut them into 2.5x 2.5 inch squares.
- Whenever you have a minute add squares to your box and before you know it you will have quite a few 2.5 inch square ready to use for any project you're working on.
Here's the re-do on one of my Great Granny Blocks.
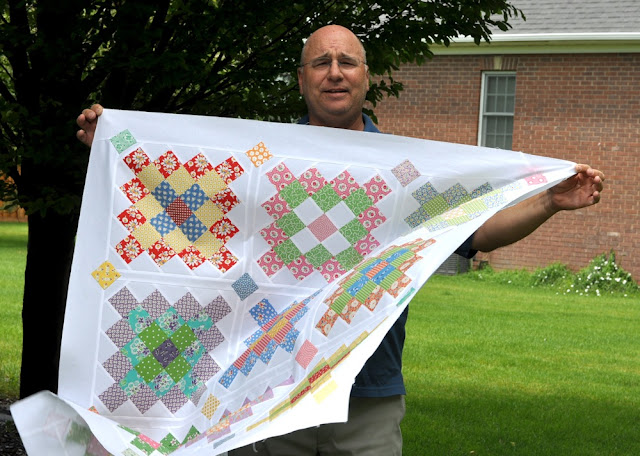
Here are a few pictures of my finished quilt!
I used Lori's instructions on cutting the sashings and the border. Go HERE for the tutorial.
Notice the squares in the sashings?
Well, I decided to add my own flare by hand appliqueing squares where the blocks intersect.
The applique squares are set on point to compliment the pattern.
Here's How I Made the Squares:
- I used 16 squares measuring 2.5 x2.5 inches.
- Starch one fabric square at a time.
- Turn the fabric 1/4 inch on one side then press.
- Turn the fabric 1/4 inch on the opposite side then press.
- Repeat for the remaining two sides of the square.
- I used Applique glue to secure the squares in place.
- I then used matching threads to applique each square in place.
My husband helped me out by holding the quilt but the wind wasn't cooperating.
He's been on conference calls all morning so I had to make it quick.
The wind finally died down and I was able to catch a few pictures before his next meeting.
I'm really happy with how it turned out and can hardly wait for, my friend, Kaylene to quilt it!!!
If this quilt has inspired you, it's not too late to join the Great Granny Along. Go HERE to read more about it and her links will direct you where to go to sign up.


