Monday, December 3, 2012

Christmas Countdown

To Celebrate the Christmas Season I thought it would be fun to do an Ornament Countdown.

I'll be sharing some of my favorite ornaments from my Christmas Tree.

Here are the pictures I've posted on my Facebook page thus far and you can see all of the ornaments that I've posted for the Month of December here on Instagram .

Day One

Day Two

Day Three

I hope you enjoy my COUNTDOWN to CHRISTMAS!!!

Wednesday, October 31, 2012

Happy Halloween


Be Safe trick or treating tonight with all of those little ghosts, witches, and vampires!


Tuesday, October 23, 2012

Book Cover Reveal


I can finally show you the picture of my daughter's book cover. It's very eye catching and we love it! Also, I can announce that her book sold to Hot Key Books in the UK and will be coming out the same day as the U.S. on May 21st 2013. 

The Back Cover Copy: 
Plenty of teenagers feel invisible. Fiona McClean actually is.

An invisible girl is a priceless weapon. Fiona's own father has been forcing her to do his dirty work for years—everything from spying on people to stealing cars to breaking into bank vaults.

After sixteen years, Fiona's had enough. She and her mother flee to a small town, and for the first time in her life, Fiona feels like a normal life is within reach. But Fiona's father isn't giving up that easily. 

Of course, he should know better than anyone: never underestimate an invisible girl.

The Blurb:
“Debut author Natalie Whipple deftly explores painfully real teen experience through delightfully unreal stories. Transparent is a smart, funny, tense gem of a book, and Fiona claims a spot as one of my favorite heroines.” Kiersten White, New York Times bestselling author of the Paranormalcy trilogy 

Pre-Orders are available on Amazon

Thanks for your interest! Have a GREAT day!

Friday, October 12, 2012

Crazy Excited!!!

I wanted to take a few minutes today and share some great news with all of my friends. . .

First...

We are all CRAZY EXCITED around our house with BIG NEWS that you can now PRE-ORDER my daughter's book on AMAZON. You can also check out the news on my daughter's recent BLOG post if you're interested.

Second. . .

The BIG Cover REVEAL will happen in about 10 days!!! I've seen it and it's so awesome!!! I will make sure to share it with you when I can.

Just in case you don't know. . .

I've shared a few things in the past about my daughter becoming an author and today we are excited. When TRANSPARENT (her book) comes out on May 21, 2013 it will have been TWO long years since she signed the contract with Harper Teen (Harper Collins) not to mention how long it took before that to acquire a literary agent.   

The time has finally come to start seeing her dream becoming a reality.

Quilting Comparison. . .

There is more effort in making a book come to life than I could ever have realized. I've learned this in watching my daughter go through the publication process and it's not an easy thing to do!

I believe that's why doing hard things and then following through until we've reached our goal or task gives us such a deep sense of satisfaction and meaning in our lives.

Quilts, especially quilts that require a lot of time, become heirlooms!! Whenever I see Baltimore Quilts, or Quilts with a gazillion pieces I think of how much time and effort and expertise that went into creating such a beautiful piece of art. I love quilting and hope that someday my quilts will be heirlooms to my children and their children.

I just LOVE QUILTING and CREATING!!!

Have a WONDERFUL weekend and take some time to SEW!!!

P.S. I'd love it if you would take the time to go to the Amazon link and click the LIKE button. Thanks for your help in generating excitement about the book!

Saturday, September 29, 2012

Book & Mini Mug Rug Winner

Thank you to everyone who left a comment. I really enjoyed reading about all of the favorite places in the world that you all love. I think one of the more popular favorite places was your own backyard. What's not to LOVE about HOME!!! 

Many Congratulations go out to Comment #6 from Lisa Marie

I will mail the Book and the Mini Mug Rug to you as soon as I hear from you.


Wednesday, September 26, 2012

Springtime in the Rockies Blog Tour & Giveaway

Welcome to my part of the Springtime in the Rockies Blog Tour that runs through Sept. 27th.

Even though it's officially FALL here in the Rockies it seems like SPRING with all of the beautiful colors on the mountainside. Yesterday I was driving to a family gathering and the colors were out in force. Everywhere you looked you could see color splashed across the valley!! It was absolutely beautiful!!!

I took this picture Monday evening around 7pm as the sun was going down. I saw this beautiful view as I was dropping my daughter off at her dance class so, I rushed home and grabbed my camera so I could capture the beauty that was all around me. The valley literally glowed! I love the mountains and sometimes they become such a part of your life that you can easily forget to look at them and take in their beauty. Note to Self... Remember to STOP and LOOK around YOU! Enjoy the Fall Colors!


My favorite mountain growing up was Mt. Timpanogos. Every day I could look out my window and see it's majestic peeks. I loved seeing my mountains and when I moved to California it just didn't feel like home. When we moved back I knew it was home because I felt comforted seeing the mountains all around me.

And that leads me into talking about quilts, which always bring comfort! Right? Well, I want to share with you a new QUILT BOOK called "Springtime in the ROCKIES" by Konda Luckau and 8 other Rocky Mountain Quilters. 


Today I'm joining with my friend, Machelle Preston, in celebrating her project in the new book "Springtime in the ROCKIES" and the quilt is called "Stepping into Spring". . . it's a darling Nine-Patch and Snowball Quilt (along with a few HST's) with a bit of applique and embroidery sewn in the center of the quilt. You will find Machelle's Quilt on pages #54-59.


The BIG NEWS today is that. . . I'm not only giving away THE BOOK. . . but I'm also giving away a MINI MUG RUG that I made up using a scaled down block version of Machelle's quilt project. Isn't it sooo cute? I love things that are itty bitty, teeny tiny, and really small.

The Block measures 5 inches square and it's the perfect size to place your hot mug of chocolate on while you're working on your FALL and WINTER Projects...

I hope the winner loves it as much as I do because I almost kept it for myself. lol.


The List of Quilter's Participating in the Blog Tour:

Make sure to visit each blog for a chance to win a book.

Sept 19th
Kansas City Star http://www.pickledish.com/

Sept 20th
Amy Smart http://www.diaryofaquilter.com/
Sherri McConnell http://www.aquiltinglife.com

Sept 21st
April Mazzoleni http://aprilmaedesigns.com/
Maggie Barber http://shortcookie.blogspot.com

Sept 22nd
Becky Morganson http://stitchesandsewforth.blogspot.com/
Marion McClellan http://myquiltdiet.blogspot.com/

Sept 23rd
Emily Herrick http://crazyoldladiesquilts.blogspot.com/
Kathy Miller http://makingitfun.blogspot.com/

Sept 24th
Karlene Riggs http://karleneskreation.blogspot.com/
JoyLyn Rigby http://broadbentquiltshop.blogspot.com/

Sept 25th
Margie Ullery http://www.ribboncandyquilts.blogspot.com/
Shannon White http://itssewshannon.blogspot.com/

Sept 26th
Machelle Preston http://cherrytreecottagequilts.blogspot.com/
Kim Walus http://bittybitsandpieces.blogspot.com/

Sept 27th
Konda Luckau http://moosequilts.blogspot.com
Jenifer Dick http://www.42quilts.com/


Here's what you'll need to do to enter the giveaway...

  • Leave ONE comment telling me your favorite place in the world to visit!!!
  • I will pick one winner on Saturday, September 29, 2012.
  • I will then send the book "Springtime in the Rockies" and the Mini Mug Rug to the winner.
  • If you are a NO COMMENT BLOGGER, or you don't have a BLOG, then just leave me your email address in the comment section.

THANKS FOR READING MY BLOG and for LEAVING A COMMENT!!!

Wednesday, September 12, 2012

MONSTER Letters


Today I'm blogging about one of my new favorite creative places to visit, browse, and spend money at. The place is called The Wood Connection and it's a store filled with holiday projects of every kind along with all the supplies you need to make the many projects in their showroom. You will also find wooden frames of all sizes, plaques, blocks, ribbons, paints, tools, cut vinyl letters, sayings and also a variety of wooden letters. The hardest part is picking out just ONE project.

I recently finished making this set of MONSTER letters that I'm using for my Halloween decorating this year. I think my grandkids will really like them. I still have to purchase the three little monsters and I thought it would be fun to put their names on each of the three stands. 

Go HERE to see the 3 little wooden monsters I have yet to make.


Click HERE to see a few more of their Halloween Projects.

What I love most about their projects is that it takes a minimal amount of painting and all of the designs on each of the letters is done using scrapbook paper and then adding trim like ribbon, ric rac, buttons, and fur, just to name a few. On this project I also used heat set jewels on the letter T. You should be able to click on each of the pictures to get a closer look.


Go HERE to see their CRAFT TIPS on how to paint the blocks and apply the paper to the wood.


Go HERE to follow The Wood Connection on PINTEREST!


Right now The Wood Connection is only located in Utah but when I talked with the ladies at the store they were hoping to be able to ship items in the not too distant future. So, next time you find yourself in UTAH make sure to visit one of their three locations and give yourself at least an hour to browse and take it all in.


The Wood Connection is located at:

6680 South 300 West
Murray, UT 84107
801.265.2255

530 East State Street
American Fork, UT
801.763.9556

Furniture Store
372 West Winchester Street
Murray, UT
801.261.1013

Tuesday, August 7, 2012

Great Granny Needle Book

Okay Ladies. . . I'm going a little bit crazy reducing and resizing the Great Granny Blocks. It's been so much fun and I just had to show you another little project I've been working on today. I've included the cutting list to make this Mini Great Granny Block but you're on your own when it comes to making the needle book. Tutorials can sometimes take longer to make than you think and right now I just don't have a lot of time. I have out of town family here for 10 days and then after that I have more company coming for another 5 days and then I go back to School on the 21st of August. If you need help though, let me know. I can answer just about any question you might have.

On the funny side of things. . .when I showed the itty bitty block to my husband he called it Molecular Quilting. I got a big laugh out of that and told him that you can't go too much smaller than this without the bits of fabric getting difficult to put through your sewing machine and not burning your fingers when pressing the seams.

Talk about itty bitty. . . each little square in the block measures 1/2 an inch by 1/2 an inch.

FYI: There are 41 pieces in the Great Granny Block.


Great Granny Needle Book
Finished Block Size: 3 1/8" x 3 1/8"  •  Finished Needle Book Size: 4" x 4"

Cutting List:

Out of Red Black & Grey Fabric:
  • Cut 1 Red Square @ 1" x 1" for Baby Center
  • Cut 4 Grey Squares @ 1" x 1" for Mama Round
  • Cut 8 Black Squares @ 1" x 1" for Granny Round
  • Cut 12 Red Squares @ 1" x 1" for Great Granny Round

Out of White Fabric:
  • Cut 12 Rectangles @ 1" x 1.5" for end of rows
  • Cut 4 Rectangles @ 1" x 2" for the corners

The instructions for making Great Granny Blocks
can be found @ Bee in My Bonnet.


I used White Bamboo felt for the fabric you stick the needles in and used


I used a red snap for the closure.

I also wanted to place the scissors and thread next to the needle book
so you could get a feel for how small the block really is.

The finished size of the the needle book is 4" x 4"


I hope you enjoyed seeing the Great Granny Needle Book.

Monday, August 6, 2012

Great Granny Pincushion Tutorial

It's been so much fun seeing all of the blocks and finished quilts over at the Great Granny Along
and I've been so inspired by everyone that I wanted to reduce the block and make a pincushion.

So today, I pushed off cleaning the house and made a itty bitty Great Granny Pincushion instead. It's much more fun creating than cleaning. I'm just putting off the inevitable and will need to get some cleaning done before I go back to work in a couple weeks.

Anyway, I started thinking that maybe all of you would like to make a pincushion too. . .

So. . .

I put together a little tutorial on how to make your very own Great Granny Pincushion.

First off, the directions for making the block are exactly the same directions I used to make my miniature block. Go check out Lori Holt's Tutorial HERE. The only difference in the blocks is the size of the squares and the rectangles. I also added the instructions for putting together the pincushion.

Not only can you make a pincushion but, you could also make:
  • More blocks and make a small doll quilt (I'm thinking I need to make a doll quilt too).
  • Make the block into a Mug Rug to use by your sewing machine or on your cutting table.
  • Frame the block and hang it in your sewing or craft room.
So, enough talking and on to the Tutorial. Here it is. . .

NEWS FLASH!!!
I had a great epiphany early this morning that I wanted to share with you!

I'm sure many of you collect CHARM PACKS. . . Am I right?

Well, I realized this morning that you could also just use 4 charm squares from any Charm Pack to make the pincushion! When I did the math in my head I realized that you can get SIXTEEN (16) 1 1/4 inch squares out of each 5 inch Charm Square. Isn't that cool? Just another way to use all of those amazing Charm Packs you have laying around. Although, I do find it hard to open them up and actually use them. lol.


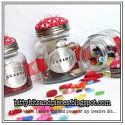
The Great Granny Pincushion
Finished Size: 5x5 inches

Pincushion Supply List:
  • Four different prints for the block
  • White Fabric for the block background
  • 5" x 5" Acrylic Ruler (Similar to the "Dear Jane" Ruler)
  • Pincushion Filler (I used crushed Walnut Shell)
  • Thread
  • Buttons

Cutting List:

Out of Multi-Colored Fabric:
  • Cut 1 Square @ 1.25 x 1.25" for Baby Center
  • Cut 4 Squares @ 1.25 x 1.25" for Mama Round
  • Cut 8 Squares @ 1.25 x 1.25" for Granny Round
  • Cut 12 Squares @ 1.25 x 1.25" for Great Granny Round
  • Cut 2 Squares @ 5" x 5" for Pincushion Back
  • Cut 1 Strip @ 1.25" x width of Fabric for Binding

Out of White Fabric:
  • Cut 12 Rectangles @ 1.25" x 2" for end of rows
  • Cut 4 Rectangles @ 1.25" x 2 1/4" for the corners
  • Cut 1 Square @ 5" x 5" for Pincushion Lining


Instructions:

1. Make one Great Granny Block following these instructions.


2. Use a 5"x5" ruler similar to the "Dear Jane" ruler you see in the picture below.


3. Center the Ruler and trim off the excess.


4. Take the two 5" squares for the pincushion back and press one square in half.


5. Place right sides together with the pressed square on top.


6. Sew along the pressed line leaving a 1.5" gap then continue sewing to the opposite edge. Make sure to back tack where you stop and start the sewing.


7. Now fold the wrong sides toward each other to reveal the right sides of fabric.


8. The place where you didn't sew becomes the opening where you will fill the pincushion with the crushed walnut shells. Use a funnel to fill it up.


9. Now take the block, the white lining, and the backing. Then stack one square on top of the other.


10. Pin the layers in place.


11. Take the 1.25" inch strip and sew a single binding around the four edges.


12. Turn over your quilt and fold the edges toward the raw edges of the block.


13. Now fold the folded edge up and over to the back of the block. Press.


14. Turn the block over to the front and stitch in the ditch along the edge of the binding making sure the underside is sewn in at the same time.


15. Fill the pincushion with crushed Walnut Shell, using a funnel,  and fill to the desired density.

16. Place a small amount of batting inside opening to prevent filling from falling out, then stitch the opening closed.

17. Using heavy thread stitch a button to the center and pull tightly, then secure the thread and cut.

18. You're Great Granny Pincushion is done. Now, how about making another one for a friend?

I hope you've enjoyed this tutorial and if you have any questions feel free to send me an email. Remember, I love comments! So. . . feel free to leave as many comments as you like. It makes me feel good knowing that you like what I do. Yes...I'm fishing for compliments. lol.

Have a Great Day!!!

Tuesday, July 24, 2012

My Fabric Box & GGA Quilt Finish

Hi Everyone!

I'm excited to share my finished Great Granny Quilt but, first I thought I'd share a tip with you and a new green block that I decided to re-do before I show you the quilt. Of course, I can't prevent you from being as excited as I am and scrolling down to have a look but, that's okay. Scroll away, just make sure and come back to read about my great fabric tip.

So, here's my collection of 2.5 inch squares that I started 5 or 6 years ago. I can never remember the exact day but, it's been a long time now since I made my box of fabric squares.


Anyway, when I first saw the Great Granny Along I immediately pulled out my box of squares. It was a great resource of already cut 2.5 x 2.5 inch squares and while I was working on the Great Granny Along I actually added more squares to my box every time I cut new fabric for my blocks.

Supplies for Fabric Box Collection of 2.5" Squares"
  • 12.5 inch Plastic Scrapbook Box
  • Cereal Box Cardboard (fabric dividers)
  • Variety of 2.5 x 2.5 inch square of fabric

Start Collecting 2.5 x 2.5 inch squares:
  • Whenever you buy fabric cut a 2.5 inch strip off and then subcut it into 16 squares.
  • Whenever you're cutting fabric for a quilt project just cut an extra 2.5 inch strip and then subcut it into 16 squares.
  • Whenever you have any leftover scraps just cut them into 2.5x 2.5 inch squares.
  • Whenever you have a minute add squares to your box and before you know it you will have quite a few 2.5 inch square ready to use for any project you're working on.


Here's the re-do on one of my Great Granny Blocks.


Here are a few pictures of my finished quilt!

I used Lori's instructions on cutting the sashings and the border. Go HERE for the tutorial.

Notice the squares in the sashings?


Well, I decided to add my own flare by hand appliqueing squares where the blocks intersect.
The applique squares are set on point to compliment the pattern.

Here's How I Made the Squares:
  • I used 16 squares measuring 2.5 x2.5 inches.
  • Starch one fabric square at a time.
  • Turn the fabric 1/4 inch on one side then press.
  • Turn the fabric 1/4 inch on the opposite side then press.
  • Repeat for the remaining two sides of the square.
  • I used Applique glue to secure the squares in place.
  • I then used matching threads to applique each square in place.


My husband helped me out by holding the quilt but the wind wasn't cooperating.
He's been on conference calls all morning so I had to make it quick.


The wind finally died down and I was able to catch a few pictures before his next meeting.


I'm really happy with how it turned out and can hardly wait for, my friend, Kaylene to quilt it!!!


If this quilt has inspired you, it's not too late to join the Great Granny Along. Go HERE to read more about it and her links will direct you where to go to sign up.

Saturday, July 21, 2012

Saturday Projects-Blog Button

Here's my new Blog Button. It's been a long time coming but I finally found something that I'm proud of and willing to use to advertise my blog.

I'm still trying to figure out the html stuff and I can't get my picture to come up so I'm going about it another way. I've read a few blog posts about creating buttons but it's just not my expertise. So, I will continue to fumble in the dark and have a stab at it.

Wish me luck!

Here's my blog button and when you see it on the sidebar of my blog that mean's I succeeded! lol.

Update: I think I did it. You'll see my button on the sidebar! Yippee! I used this blog tutorial that really helped me out. Thanks to Somewhat Simple's Blog Post called Blogging 101-How to Make a Button

2nd Update: I got the dang button to work but it doesn't seem to link back to my page. HELP!!! If you can help me out then just give me a holler! I've followed the directions repeatedly to make sure I got it right. It looks right but doesn't want to link. I tested it on my family blog and it shows up just fine but doesn't link over. I finally resorted to adding a picture gadget and then adding the link.


I've been inspired by all of the Pincushion Jar's on Pinterest and when I found these jars at Hobby Lobby I knew I had to have them. They are the cutest shape and came in 4 sizes. I pick 3 of the 4 different sizes and took them home with me.


The metal tag I made using my dies and art metal. You can find a link to my blog post about how to do it and where to get the stuff you need to do it HERE. You can link to all four parts of the tutorial from there.


The biggest jar in the center is my little sewing kit jar and the smallest jar holds a few of my buttons. The medium jar holds my collection of HEART buttons.


Aren't they just adorable together?


I hope you enjoyed this Saturday Projects Post!

What have you been creating today?

Sunday, July 15, 2012

Great Granny Along

If you can believe it. . . I've gone and joined a Sew Along!

I don't usually join Sew Alongs because I'm rather pathetic at it and I don't especially like feeling like a failure. Any of you know what I mean? It has to do with following through on things and if I can't follow through then, I try not to join any type of Block of the Months, Sew Alongs, or Block Exchanges, unless I know for sure that I have the time and can actually accomplish the task I've signed up for. I just don't like being a flaky flake! Time for the fun stuff can be very elusive!


Well, here are the details. . .

The Sew Along is called The Great Granny Along and it was started by two of my long time friends and bloggers, Lori of Bee in My Bonnet Co. and Jodi of Pleasant Home. I was sooo excited about the sew along that I practically ran to join the Flickr group.

I'm having such a great time that I would encourage you to go HERE and join. No pressure, just a lot of FUN and once you make ONE block I know you'll want to make another. . . and another!!! I've already made 7 and I have 2 more blocks cut out  and ready to sew.  That's 9 Blocks and that's enough blocks to finish a small quilt as seen in Lori's blog post.

It's fun! It's fast! It's easy! Go Sign UP NOW!!!


For a little inspiration. . . here are the blocks I've made so far. . .


Have FUN making Great Granny Blocks
and I look forward to seeing everyone's blocks in the Flickr Pool.

When I'm done I think I'll have to make some Red, Black, White, and Grey Blocks.

The Possibilities are ENDLESS!!!